Roast Beef and Provolone Hoagie

photo (15)

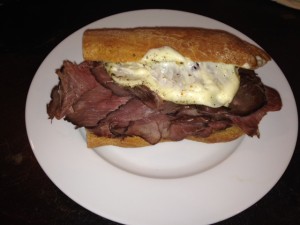
Yeah, I know.   I’ve been posting salads and lots of salmon recipes, but *sometimes*, you just need a hoagie.  This one is a doozy.  And, this one is NOT MINE.  It’s my honey’s ~ and, yes, it covers the entire plate.  I don’t recommend eating these every week… but, C’mon, it’s delicious.  Once in a while, it’s OK.  I won’t tell!

Your hoagie is only as good as the bread you put it on.  I used my homemade sourdough.  If you don’t bake, at least visit the bakery section of your grocery store and get a nice, artisan baguette.

You’ll need:

1 baguette

3/4 lb. thin sliced good roast beef (like Boar’s Head)

4 slices provolone cheese

extra thin sliced red onion

oregano

crushed red pepper

Slice the baguette in half, creating top and bottom crusts. photo 1 (34)

Slice again, from top to bottom in desired sizes for hoagies.  Open it up and place on a baking sheet.

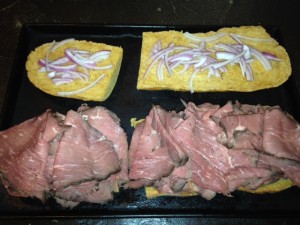
photo 2 (32) Add thinly sliced onions to one half and roast beef to other half, proportionate to bread.

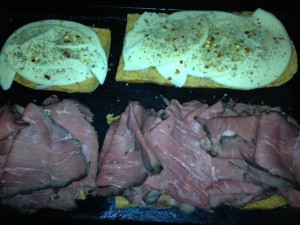
photo 4 (21) Top the onions with provolone and sprinkle on oregano and crushed red pepper, to taste.

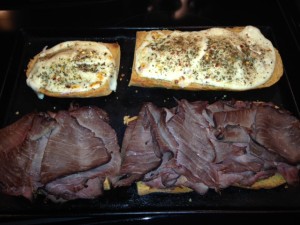
Broil in oven til melty and slightly browned.  photo 5 (19)

You can thank me later!


Standard

Salmon Tostados

Sometimes you need a quick meal – and who’s to say it can’t be delicious, too?  This one fits the bill.  I can pull this off in about 10 minutes including cooking time.  It’s made from staples we keep on hand and we ♥♥♥ it.  Enough of the buildup – let’s see it!

photo (13)

This recipe makes 2 tostados.

1 6oz can boneless, skinless canned salmon (wild caught), drained

(I get mine from Sam’s Club – it’s pictured here)  Member's Mark® Wild Caught Alaskan Pink Salmon- 6/6 oz. cans

If your protein needs are high, it’s ok to add another can – they are tiny, after all.

8-10 kalamata olives

5-6 sun-dried tomatoes in olive oil – you don’t need the liquid – just the tomatoes

1 Tbps. real mayo

1/4 tsp. fresh-ground black pepper

2 flour tortillas

1/2 cup grated cheddar cheese

1 ripe avocado

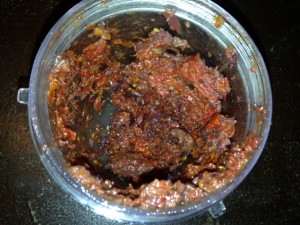
Place the olives and sun-dried tomatoes into a small food processor (I use a Bullet with the small jar attachment) and grind this into a spreadable, paste-like consistency. photo 5 (18)

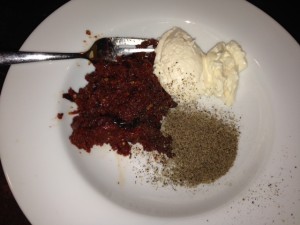
If you don’t have this kitchen appliance, just chop it up as small as you can using a knife, the flavor will be the same, just not the consistency.  Take the tomato/olive mixture and place it into a mixing bowl.  Add the mayo and freshly ground pepper.  photo 1 (30)

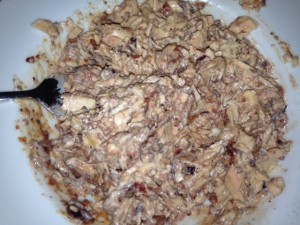
Mix and stir until combined.  Flake in the drained salmon.  Stir gently to just incorporate the salmon (but don’t KILL it here).

photo 3 (21)

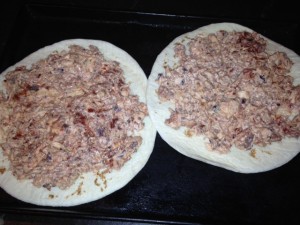
Now we are ready to assemble the tostados.  Onto a baking sheet, place 2 tortillas side-by-side and not overlapping.  Top each with half the salmon mixture, spreading to an even layer leaving about 1/2 inch of tortilla edge.  Now add 1/4 cup cheese to each. photo 4 (17)

Slide this into an oven and turn the broiler on.  Broil for 3-5 minutes or until hot and bubbly, with some browning of the cheese and exposed tortilla.  Watch closely – it can go from “almost done” to “too done” in a hurry.photo 2 (29)

Slide each tostado onto a plate and top with 1/2 avocado.   ENJOY!  photo 3 (22)

Standard

Salmon Patties on Pink Lentils

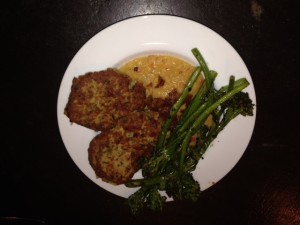
…with a garnish of bacon and a side of oven-roasted broccolini.  Oh, my!  What are we celebrating??

photo (12)

LIFE!  And, protein!  Sometimes an ordinary day can be made special with a special meal.  This looks swanky, but is simple to make and surprisingly inexpensive.  Let’s get the lentils going and then start the salmon patties, er… “croquettes” if you want to sound fancy.

1 cup of pink lentils – sorted, debris removed – get them ready and set aside

1/2 cup chopped red onion

1/2 cup chopped sweet red pepper

Into a medium saucepan over medium heat, place the onion and red pepper.  Drizzle enough olive oil onto the veggies so they don’t stick and cook for 3-4 minutes.  Once the veggies are soft, add the pink lentils and 2 cups of chicken broth.  You may need more liquid later, but wait and see.  We want a nice, thick base for the salmon patties so the lentils do not need to be wet and soupy.  When the lentils come to a boil, reduce heat to simmer and place a lid on the pan.  Keep an eye on them, but let them go a little longer than usual – about 25 minutes.   Make sure you have enough liquid so the lentils don’t stick to the bottom.  Add either water or chicken broth, as needed, up to 1 more cup total.

For the salmon patties:

1 can salmon (15 oz), drained but not squeezed – just pour off extra liquid

1 Tbsp. spicy whole-grain mustard

3 Tbsp. minced onion

3 Tbsp. chopped fresh parsley

zest of one lemon

freshly ground black pepper

1 tsp. Old Bay seasoning

3-4 Tbsp. flour or finely ground oats – this will be more or less, depending on how much moisture is in mixture

2 eggs

Put everything except eggs into a bowl and mix together.  Add eggs and stir gently.  It should be moist and workable.  If it seems too wet, add some additional flour.  This is the most important part of making the patties.  If they are too wet, they will spread and break apart.  If they are too dry, they won’t adhere.  Once you get the salmon mixture *right*, heat a skillet to medium low.  You will need some fat (butter, olive oil, bacon drippings, coconut oil, whatEV)  Add enough fat to coat the bottom of the pan.  Using your hands and a spoon, scoop out and shape each patty, gently laying it in the hot oil.  Leave space between each, cooking 3 at a time to total 6 patties in two batches.

Hopefully, your lentils have softened up nicely in the meantime.  If they are too wet, take the lid off and let the extra liquid bubble off.  Stir and break them up to form a nice very-thick-soup-like consistency.

To serve:  spoon out about a half cup of pink lentils into a bowl.  Place 1-2 salmon patties artistically on one side.  Crumble 2 slices of  extra-crisp bacon in a small bowl and sprinkle on top.  (See: BACON post)  Place oven-roasted broccolini on the side (See:  Oven Roasted Veggies post) and you are there.


Standard

Jaeger Schnitzel

photo (8)

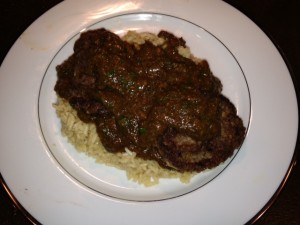
Pronounced  “Yeager” (like Chuck Yeager), Jaeger Schnitzel is a hearty and deliciously decadent meal.  It was a birthday request from my honey and I was happy to make one of his all-time favorites.  He ordered Jaeger Schnitzel many years ago in German restaurant and was blown away.  This is my take on that experience with apologies in advance to any deviations from authentic German recipes.

1 lb venison cutlets (pork, beef, chicken or turkey are all acceptable substitutes)

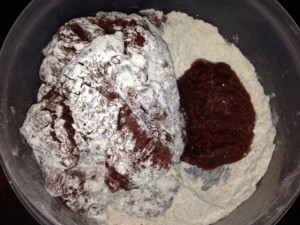
2/3 cup all purpose flour, in a bowl seasoned with:  1 teaspoon salt, 1 teaspoon black pepper, 1 teaspoon garlic powder and 1 teaspoon Chipotle chili powderphoto 1 (18)
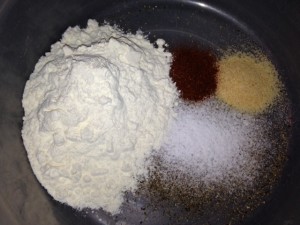
Stir the seasonings into the flour and lightly coat each piece of venison.  photo 4 (11) I will mention this is not “breading”,  just a light coating of seasoned flour that sticks to the natural moisture in the cutlets.  Heat up a medium skillet and add 3 Tbsp. fat.
I used Spectrum shortening.  images

It’s organic and performs nicely in high heat.  You can find this at most health food stores and larger grocery stores.  Once the pan is hot, gently place the cutlets in the pan being careful to avoid crowding.  photo 1 (19)
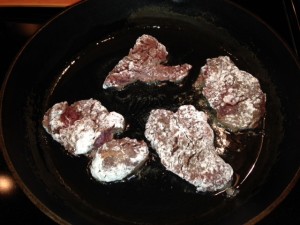
Once you’ve got the meat going, prepare your veggies for the mushroom sauce:  photo 2 (20)
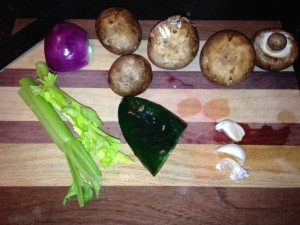
5 baby portabella mushrooms

1/2 red onion

2 sticks celery

1/2 poblano pepper

3 cloves garlic

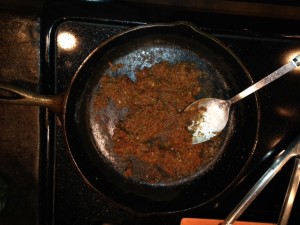
In a food processor, finely mince all the veggies, scraping down the sides as needed.   It should look about like this when the veggies are ready to go.
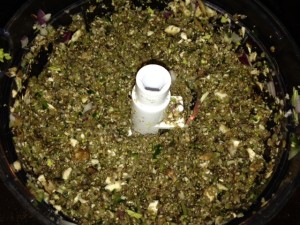
photo 3 (15) I ♥♥♥ a soffritto!  It allows me to sneak in lots of extra veggies!

Back to the browning cutlets ~ cook the meat in batches, adding additional fat if needed.  Usually 3-5 minutes on the first side then 2-3 minutes on the second side.  You’ll know when it’s done.  Then, place the meat in a 200 degree oven on a baking sheet to hold warm while you make the sauce.

Use the same skillet in which you cooked the cutlets, removing any really dark or burned bits.  Spoon your soffritto veggies into the pan and begin stirring.  The moisture from the soffritto will begin “pull up” the crazy flavor from the pan.  This is a good thing.  Cook and stir the soffritto for 5-7 minutes, scraping up the deliciousness from the bottom of the pan.  I added a little more fat here to loosen things up.  photo 5 (12)
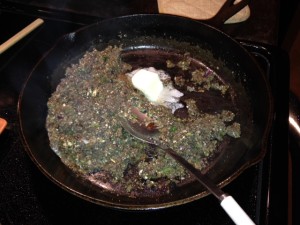
 

It’s also around this time you will need to start the rice.  I like organic basmati.  Place 1 cup rice in a pan and turn on the heat to medium high.

Give the rice a swirl of olive oil.  photo (7) Let the rice heat up and stir it to coat each grain with the oil.
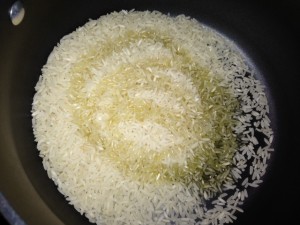
Once it begins to smell slightly toasted but *BEFORE* the rice begins to brown, add 2 cups of beef broth.  photo 1 (20)
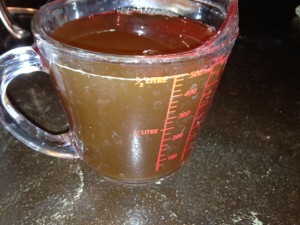
Place the lid on pan, reduce the heat to simmer and let it go for about 20 minutes… plenty of time to finish the sauce.

And, back to the soffritto!  Add about 1.5 Tbsp. of tomato paste.  photo 5 (13) Stir the tomato paste to incorporate.  It will need a couple of minutes to come together just so.  Then, you add the rest of the seasoned flour (left0ver from coating the cutlets).
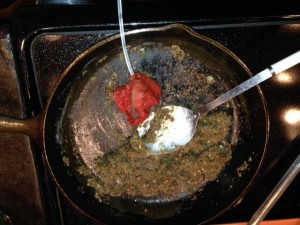
Let it cook for 2-3 minutes.  It’s going to become thick and gloopy.  Don’t worry!

You just want to cook the flour and it’s all going great!  photo 1 (21)
Now, add about 2 cups of beef broth.  Stir and stir and stir.  Mash out any lumps.  I keep my heat medium low and it’s really forgiving here.photo 4 (12)
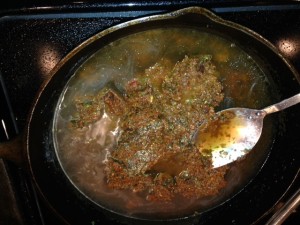
If you are cooking too hot and fast, panic can set in.  Just be mellow, keep stirring and it will come together.  In a few minutes, it will all get friendly and you have tomato-spiked mushroom gravy!  To this, add a big handful of chopped parsley.  photo 4 (13)

Plate it up and go to town!  Ich liebe es!photo (8)


Standard

Chicken Pot Pie

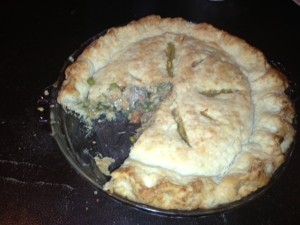
IMG_0806

It’s COLD!  And, when it’s really cold, sometimes you just need some real, comforting home food to warm you up from the inside out.  We only make this dish about once a year, but my husband has been campaigning for it lately.  He makes the crust and I make the filling.  Can’t ask for a better deal!

To begin:  stew a chicken

I do this in the slow cooker.  In the morning, I place 1/4 onion, 3 cloves garlic, 1/2 lemon and 1 cup filtered water in the slow cooker.  Add a rinsed, clean chicken.  Salt and pepper go on top.  Place the lid on tightly, turn the heat to high and let it go.  In the afternoon, skin and bone the chicken.  Filter the veggies out of the cooking liquid and keep the broth!  You won’t use it all in this dish but, it will be fantastic in soup or any recipe calling for chicken broth.

Once the chicken meat is set aside, begin preparing the filling.  OH MY GOSH!  You’re going to need a crust.  See?  That’s where teamwork comes in.  My hubby makes the holiday pies and any pie crusting that goes on comes from him.  Here’s an excellent resource on the process he uses and the recipe he uses from Cooks Illustrated:

http://food52.com/recipes/24966-cook-s-illustrated-foolproof-pie-crust

NOTE: This recipe makes 1 crust – for a double crust, double the recipe.  You will need to double for chicken pot pie.

It’s now the only pie crust he makes.  Perfect for sweet or savory dishes.  So, get *someone* to do the crust and give it time to chill for a couple of hours in the fridge before assembly.

Back to the filling:

6-7 white, button mushrooms, diced small

1 cup thin sliced celery

1 cup carrot “squares”  – he who makes the crust insists they must be squares like the bought ones he *used* to eat – suit yourself and your eaters

Now, this is chicken pot pie.  Use rendered chicken fat if you have it.  Don’t skimp!  I use about 2 Tbsp.  Heat the pan, add the fat, S&P and cook all the veggies til tender.  It will take 10-15 minutes on medium low heat.  They don’t need to brown and they should not be crunchy in this dish.  Once the veggies are perfect, make a roux.  To the tender veggies, add 2 Tbsp. flour.  Cook and stir for 1-2 minutes.  Then, using your saved chicken broth (about 1 cup) turn the filling into pure decadence.  Stir to combat lumpage!  Add in about 1 1/2 cups chopped chicken.  Stir to combine and let the whole mess of loveliness come to simmer.  Now, add in 3/4 cup frozen peas.  Turn the heat off and spoon in 1/2 cup full fat plain Greek yogurt.  Taste it.  Oh yeah.  Correct seasonings, if needed.

Roll out the bottom crust and place into pie pan.  Pour in the filling.  Top with remaining crust, cutting some vent holes.  Into a 425 degree preheated oven it goes!  Let it cook for about 10 minutes then lower the heat in the oven to 400 and cook another 30 minutes or until beautifully golden.  Now, here’s the hard part, it should set for about 10 minutes before you slice into it.  If you can hold off, good for you!  It will pull up all the liquids and make perfect slices.  Either way, enjoy!   IMG_0808

We certainly did!  :0

As you can see, we only have finish pics of this dish.  I’ll do better next time!


Standard

BACON!!

I wanted to name this post “Baking Bacon” but, really, what’s better than BACON?  It’s considered the gateway meat for vegetarians… I know!  I was a vegetarian for 4 years… just not a very good one.  On to the bacon ~ the mess!  Oh my, any cook that also battles cleanup will a) use fewer dishes and b) find ways to splatter less.  This process keeps your cooktop completely grease-free.

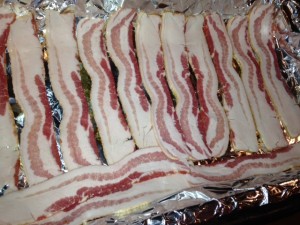
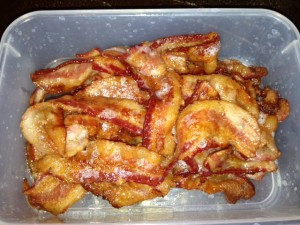
Turn your oven to 400 degrees.  Lay the bacon onto a large roasting pan in a single layer

(I line mine with foil for easy cleanup).  photo 2 (6)

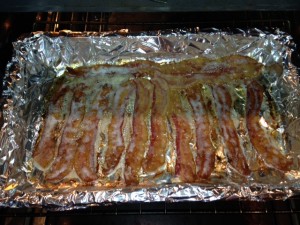
Place into oven and give it about 15 minutes.  Some of the edge pieces will cook faster so be ready to pull individual slices.  Tongs work perfectly for this.

photo 3 (3)  Cook til done.  It can go from not quite done to overdone in moments – so watch carefully the closer it gets to your liking.  I tend to cook in batches.  This allows me to cook an entire package of bacon and pull out a piece or two, as needed, during the week.  photo 5 (3)  Store in the refrigerator in an airtight container.  This also freezes perfectly.

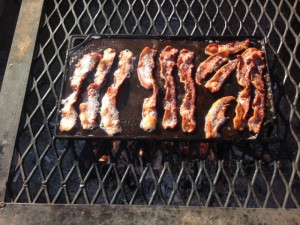
My husband sent me a pic of how he and his hunting buddy cook bacon at deer camp.  This is great for open fire cooking.

Check this out:  IMG_0795

He’s been watching!!  😉

Standard