Citrus Grilled Chicken and Black Rice Bowl

IMG_1854 1


Citrus marinated chicken.  Anti-oxidant rich black rice. Crunchy veggies.  WINNING!  This is a super simple summer supper we will be enjoying again & again.

Start with the dressing.  Into a medium bowl add:

Zest and juice of 2 tangerines

Zest and juice of 1 lemon

3 tablespoons olive oil  (if you have lemon or blood orange olive oil, use it!)


1/2 tsp. Himalayan pink salt

1/2 tsp. freshly ground black pepper

Stir the ingredients to incorporate and add 3 Tbsp to:

1 lb boneless, skinless chicken thighs in a zip top bag or glass bowl to marinate 2-4 hours.  (And YES!  You can use boneless, skinless breasts – just make sure not to overcook as this cut will tend towards drying out – we just prefer the thighs, especially if you are planning for leftovers.)


So, now you have some time ~ about 2-4 hours.  You can prepare the salad to chill in the fridge.

1 cup carrots, cut into matchsticks

1/2 cup cucumber, cut into matchsticks

2 cups dark greens, chopped fine

1 bunch green onions, diced

1 handful fresh mint, chopped fine

About half an hour before the meal, preheat your grill and make the rice.  You can use *any* rice, but for extra nutrients the black rice (funny, because it looks dark purple) is rich in super plant compounds (trust me!)  Send your honey out to grill the chicken and get busy!

I love rice.  I love making rice.  I love eating rice.  Here’s how I do it:

Heat a medium saucepan and add 1-2 Tbsp. of fat.  (grass-fed butter, coconut oil, olive oil, you get the idea…)

Stir in 1 cup of black rice and let the fat coat each grain.  Stir and coat.  Let it go until you begin to see a little browning and smell a “toastiness” – yes, I made that word up – but, I don’t know a better one.  Just let the heat and fat bring a little love to the rice.   Don’t let it burn.  If it does, start over.  It will taste like scorched popcorn and that’s just tragic.  Have your cooking liquid ready!!  I used 2 cups of chicken broth but you may need to follow the directions on your particular rice.   Once you get the love on your rice, pour in the liquid (water, water and veggie broth, chicken broth/stock) and bring to boil.  Cover with a tight-fitting lid and reduce heat to simmer.  Mine was perfect in 18 minutes.

Remove the salad from the fridge and add in the cooked rice.  Add the reserved dressing.  Taste it for seasonings.  Perfect!!  Slice the chicken thighs and serve alongside your citrus creation.  Next time, I will top with sliced avocado and another drizzle of blood orange olive oil.

Standard

Plant Powered Awesomeness!

photo (37)

You cannot see how delicious this juice tastes – but, TRUST ME – it’s the bomb dot com.  We have been juicing several times per week for a while now and I am loving it!  You can find high-speed centrifugal juicers fairly inexpensively and I used one of those for years.  Just recently, I upgraded to a low-speed masticating juicer and it was one of the best birthday presents I have ever received.  Thanks ME!

Choose organic vegetables, if available.  Wash and cut veggies to fit in juicing chute.

1 bunch kale

1 peeled beet

1 cucumber

1/2 lemon (with peel and seeds, there is a powerful compound in the peel that ups the nutritional game exponentially)

1 green apple

This makes about 2 12oz glasses.  Enough for you and someone you want to keep healthy!  Drink slowly and enjoy!

Standard

Gazpacho!

photo 2 (34)

It’s been hot, Hot, HOT!  Even so, this Gazpacho recipe is so good that I would eat it in the dead of winter.  Oh!  That’s a lovely thought!  Did I mention it’s also ridiculously easy?  Well, it is.  My 4 year old great niece helped me make this and loved the end result.  We think you will, too.  If you have a garden full of homegrown tomatoes, absolutely use those in place of the canned ones!  My garden is giving me some, but not enough – so we compromised.

Into a blender or food processor:

2 peeled cucumbers, chopped into chunks

1/2 red bell pepper, chunked

1/2 purple onion

2 scallions

1 Tbsp. parsley

2 Tbsp. cilantro (optional – you know if you like it!)

15.5 oz. can organic tomato sauce

5.5 oz. Spicy Hot V8 juice

1/4 cup good olive oil

2 Tbsp. balsamic vinegar

1 tsp. Worcestershire sauce

1/2 tsp. Himalayan or Celtic salt

1/4 tsp. freshly ground black pepper

Blend all ingredients together.  Taste for seasonings.  Serve with desired toppings of:

chopped avocado

minced parsley

minced cilantro

sour cream or kefir

chopped boiled egg

minced cucumber

drizzle of olive oil or balsamic vinegar

Go BIG on the accoutrements or go home!  The best dressed gazpacho is definitely the winner!

Standard

Asparagus Frittata

photo 3 (26)

Oh Man!  I love a good frittata!  Some sweet friends showed up with a lovely batch of asparagus fresh from their family garden and I knew immediately what would be happening.  A frittata!  Thank you, Brian & Karen!

Although it sounds fancy, a frittata is just a baked omelet.  Your frittata will only be as good as your eggs, so choose wisely.  Connect with sources at your local farmers market or by asking around – you will be surprised how easy it is to find free pastured, local and sustainable eggs – and they have the most gorgeous orange yolks to boot!

To create:

1 medium onion, chopped

1 bunch asparagus (12-15 medium stalks or 20+ pencil stalks), chopped in 1 inch pieces

1 Tbsp bacon fat (or other natural fat like butter or coconut oil)

3-4 sliced bacon, crispy cooked, chopped fine

10-12 eggs, beaten

1/2 – 1 cup finely shredded Colby jack cheese

good salt and fresh ground black pepper

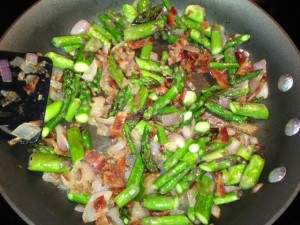
Place an ovenproof skillet on medium low heat and add 1 Tbsp. bacon fat.  When it’s loose enough to coat the pan, add chopped onion.  Cook until soft and translucent.  Add asparagus and enough salt and fresh ground black pepper for the veggies in the pan.   Cook and stir until the asparagus turns bright green.  Add the bacon pieces and reduce heat to low.  photo 1 (35)

Preheat oven to 350 degrees.  While veggies have been softening, crack eggs into mixing bowl.  Add 1 tsp. Himalayan or Celtic salt and 1/2 tsp. freshly ground black pepper and whisk into eggs.  Pour eggs into pan.  Gently cook eggs until about half-set.  Add desired amount of grated cheese and top with whole asparagus, if desired.  photo 2 (33)

Place pan into oven and watch closely.  Once the eggs are almost set (maybe 3-5 minutes) switch the broiler on.  Broil until lightly brown.  Remove immediately.  Allow to set for at least 5 minutes before slicing into pie shaped wedges.  Give Thanks for Good Friends who share and ENJOY!


Standard

Apples and Walnuts

This could just as easily be Apples and Pecans or Apples and Almonds — it does not matter which nut you use.  It’s so good!  You’re gonna make this over and over!!

Tart Granny Smith apples are the way the to go in this recipe.  They are the perfect consistency, taking on a “bready” texture when fully softened.  This can be a most fabulous thing if you are avoiding carbs/gluten/and other questionable ingredients.

So simple!  So completely perfect!

3-5 Granny Smith apples, washed, cored and rough chopped (I leave the skin on – you can peel them, especially if using non-organic apples)

photo 1 (32)

2 Tbsp coconut oil or butter (or combination of the two)

pinch of salt

1 teaspoon cinnamon

1/2 teaspoon cardamom

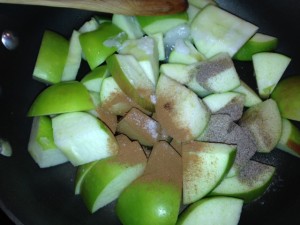
Into a medium skillet on medium-low heat, melt fat and toss in the apples.  Add spices and stir gently. photo 2 (30)

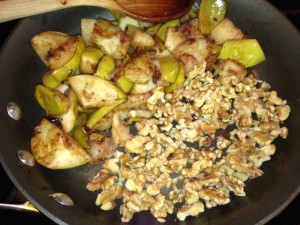
Let this go for 15-30 minutes, stirring every 5 minutes or so, depending on your preference of doneness.  The apples will break down and add their own moisture and the spices will be well incorporated at the end.  We are not looking for browning – if you are getting browning – add a little water (not much) and reduce the heat.  I like mine soft around the edges and a little al dente in the middle.  When you have reached your desired tenderness, move the apples to one side of the pan and add another tablespoon of butter.  Turn the heat up enough to get a little sizzle and add in 1 cup of chopped walnuts (or pecans or almonds).

photo 3 (23)

Let the nuts cook (stirring to get all sides) for a couple of minutes until they release their oils and you are done!  Gently incorporate the apples and nuts and scoop into bowls.  Top with Greek yogurt, if desired. photo 4 (18)

Standard

Razzle Dazzle

I gave up soda years ago.  Caffeine makes me jumpy.  Yet, who doesn’t *want* a little something tasty to sip in the afternoon?  My solution:  I came with up something delicious and refreshing out of fresh, healthful ingredients so I didn’t want or miss the sugar/acidic/bad-for-you gunk I used to drink before I gave a rip about my health.  You can make this in less than 3 minutes.  Try it!!

photo 1 (16)

1 fresh lemon

1 fresh lime

2 fresh clementines (like Cuties or whatever is in season).

photo 2 (17)

Cut citrus fruits in half and squeeze into a quart jar. photo 3 (12)photo 4 (9)

Fill with fresh, filtered water.  If you prefer a sweetened drink, add stevia or raw sugar to taste.  Drink over ice or at room temp.  Completely lovely.  Even lovelier if you have a sprig of fresh mint.photo (6)

NOTE:  I did not come up with the name for this.  That honor goes to a dear friend of mine.  Her son had moved home for a time and she made this for him.  When he’d ask for it, he’d say “Mom, could we make some Razzle Dazzle?”  Thank you, Jonas.  I believe we can!

Standard

Pumpkin 101 and Creamy Pumpkin Soup

photo 1 (11)

Gorgeous!  Besides that, pumpkins are full of beta carotene, fiber and tons of nutrients.  This one was used for decorating at the studio (and one awesome Halloween workout) where I teach Pilates.  You can buy special cooking pumpkins that are smaller and easier to manage.  However, I hate waste and I do love a challenge, so I now have several of these bad boys.  (Thanks, Weavermans!)  First, we must get it into manageable-sized chunks.  I took my sharpest kitchen knife and began slicing downward from the top.  photo 2 (11)

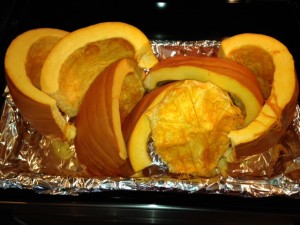
Continue doing this all the way around the pumpkin, then, make a short cut at the top below the stem to connect the long cuts and you will have pumpkin wedges.  photo 3 (6) Using a large spoon, scrape out the seeds and stringy fibers.  (Don’t throw them away – we need them later on for homemade granola!)  photo 5 (8)  photo 3 (8)

Once you have all the insides cleaned out, place your pumpkin wedges into a large roasting pan and place into a pre-heated 400 degree oven.  photo 2 (12) This will need to roast for about an hour.  When the flesh is tender enough to pierce easily with a fork, just turn the oven off.  Leave the door closed and let the pumpkin sit until it’s cool enough to work with – about another 45 minutes to an hour.  It will have browned in some place and softened considerably by this time.  photo 4 (6)

Take a wedge and use another large spoon to scoop as close to the skin as you can and remove the delicious pumpkin flesh.

photo 1 (12)photo 2 (13) You can see there are still some connective fibers left over from the seed removal.  That’s alright.  Everything is tender and they won’t even be detectable.  With all sections scraped, you end up with a LOT of perfectly golden, tender pumpkin that beats the socks off canned for flavor and texture in any recipe you have for pumpkin.

photo 4 (7)

And, since we have already gone this far.  And, since you KNOW how much I adore soup.  Let’s just make some right quick.

Into a large stock pan, place 2-3 Tbsp. of fat.  (I am using chicken fat, but butter, coconut oil or a combo are just fine.)  Add 2 big pinches of turmeric to enhance the beautiful golden color and add in some fabulous anti-oxidants plus 1 tsp. salt and 1/4 tsp. pepper.

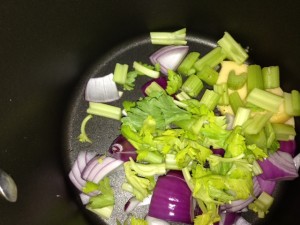
Now, the aromatics.  I used 1/2 red onion, roughly chopped and 4-5 sticks of celery, roughly chopped.  Add to pan on medium – high heat.

photo 2 (14)

I am making 10 servings (about 1 cup each) of soup.  If you wish to make less, or more, adjust accordingly.


Once your aromatics are tender, add the pumpkin flesh (in my case, about 7-8 cups).   The pumpkin is already cooked, we just want this all to come together.  We need liquid and decadence:  organic coconut milk! photo 4 (8)photo 5 (9)

Perfect.  Put the whole can in there.  Then, 2-3 cups of chicken broth.   photo 1 (14)  The coconut milk will soften and add unbelievable creaminess and up the satiety factor by a zillion.  When everything has come up to a simmer, check and see if your consistency is about right.  Remove from heat and whip out your immersion blender.  Blend until perfect.  photo 5 (10)

Taste for seasonings and adjust to your preference.  Serve and bask in the glory!  photo 1 (15)

Note:  This can easily be made vegan.  Use coconut oil for fat and vegetable broth or water for additional liquid.


Standard

Saturday Eggs

photo (4)

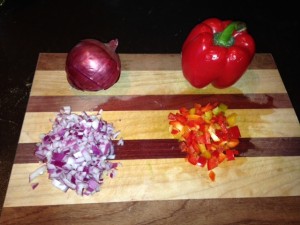
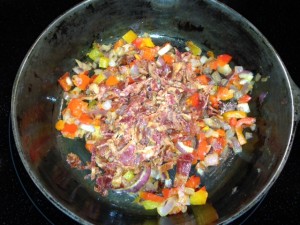
Oh, how I LOVE weekends!  We eat breakfast daily but, on weekends, it can be a little later, a little more relaxed and even a little tastier!  We call these Saturday eggs but they can be enjoyed on any day of the week.  Customize this to suit your families preferences – this is just a process.  If you want potatoes, add potatoes.  For more heat, use jalapenos.  Got some mushrooms that need to be used up?  Chop them and toss them in.  You get the idea.  You can expand this to feed a crowd.  For today, I am feeding 2, and we’ll have no trouble eating all this!  I just so happened to have red pepper,  purple onion and bacon on hand and that’s how these evolved.  photo 1 (7)

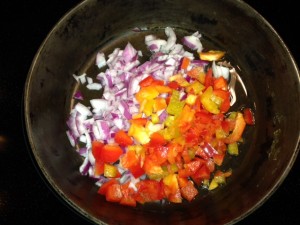
Heat your skillet to low-medium.  To the hot skillet, spoon in 1-2 Tbsp. bacon grease.  Then, add your chopped veggies.  photo 4 (3) I used about 1/3 cup of each.  Add a little salt and pepper and let them go, stirring occasionally.  Cook 10-15 minutes until the water is released from the veggies and they are soft – can’t have crunchy bites in your eggs, now can we?  The lower and slower these cook, the sweeter the onions and peppers will get.  When the veggies are “there” with maybe some browning to the edges, add your pre-cooked bacon* {see previous post BACON}.  Again, I used about 1/3 cup, chopped fine.  photo 1 (8)

Now, the eggs.  photo 2 (8) Add salt and pepper and whip them up! photo 3 (4)

photo 1 (9)photo 5 (5)

And, into the pan they go!photo 2 (9)

When the eggs are about half-set, add in a handful of grated cheese.  photo 4 (4)

Continue cooking and stirring gently, bringing cooked parts up and letting egg liquid get to the heat at the bottom of the pan.  Remove from heat and serve!  photo 5 (6)

*Note:  If your bacon is raw, simply cook it in the same skillet at the start.  It will render the fat needed for the veggies.  Once the bacon is done, remove it from the pan.  Allow to cool and chop.  Return it to the same pan as described above.


Standard

Sauteed Kale and Eggs

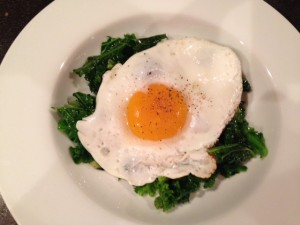
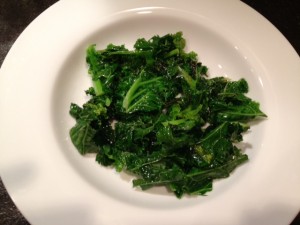
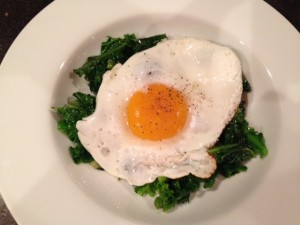
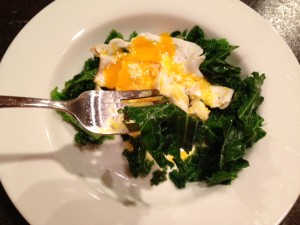
Meet my new favorite breakfast!photo 2 (5)

Kale and eggs – if you haven’t eaten greens for this most important meal of the day… Well, what are you waiting for?  They are freaking delicious.  The first time I had cooked greens for breakfast was in Jamaica – I found out it’s OK.  Other cultures *apparently* do this, so don’t be afraid of a little out-of-the-ordinary culinary excursion.

Besides being my favorite breakfast food, eggs are nutritional powerhouses.  Out-dated nutritional advice shuns eggs.  Jump into the new millennium and experiment with all the fabulous superfoods – starting with eggs!

Recipe:  with so few ingredients, it’s really important to not skimp on quality here!

eggs, 1-2 per person (free pastured, local eggs are best)

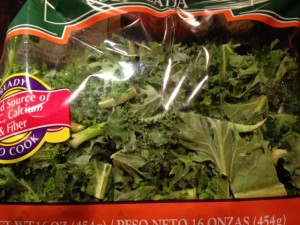
kale, 1 big handful per person (organic, pre-chopped in the bag is a major time-saver)

photo 3 (1)

fat, 1 tsp. (bacon grease, butter, coconut oil or a combo of these)

salt (Himalayan pink salt, sea salt)

Heat a cast iron skillet on medium low for 5 minutes. photo 1 (6)

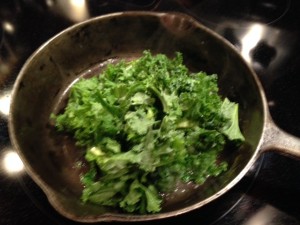
To the hot pan, add your choice of fat.  I use about 1 teaspoon bacon grease.  Add 1 big handful of chopped kale and salt.

photo 2 (3)

It will spit and sputter from the moisture on the greens and that’s OK.  Saute the kale 2-3 minutes or until you get a deepening in color and they wilt reducing the volume by about half.  You may get some “cooked” spots on the kale, that is just fine, as well.  Remove the kale to serving plate.

photo 4 (2)

If the greens have absorbed all the fat, add a bit more.  Gently crack 1-2 eggs into same skillet.  photo 5 (2)

Don’t move ’em, don’t touch ’em at all!  Add salt (and pepper, if desired).   When cooked to your preference, gently slide a spatula under the eggs and place right on top of the kale.  Beautiful!  Delicious!  Nutritious!  Bon Appetit!

photo 2 (4)photo 3 (2)

That’s it!  How simple and way faster than driving through some scary clown establishment.  Feed yourself, feed your kids and enjoy!

A final word about salt:  If you don’t think you like greens, try adding some salt.  Go easy – it’s way easier to add than it is to take out.  Remember your greens will shrink by about half, so when you salt, salt for about half the amount you normally would.  Very often there is a bitterness associated with greens, like kale.  Salt will reduce the bitterness.  So, get high-quality, natural salt (not bleached and processed) and use it to enhance your greens!

Standard

Roasted Tomatillo Salsa

Our little 3 1/2 year old niece calls this “sauce sauce”.  We all think it’s crazy good.

photo 4

And, it’s simple to make.  Just come with me.

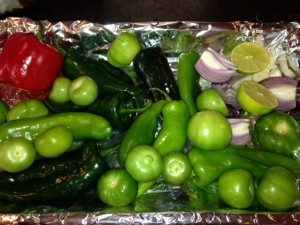
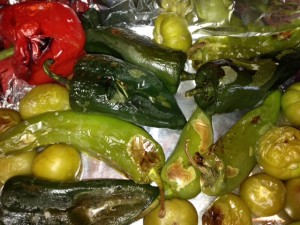
Take a large roasting pan and line it with heavy duty foil.  Into this, place the following:

1 1/2 lbs. tomatillos, papery skins removed, then washed

4-5 poblano peppers, whole, washed

4-5 Anaheim peppers, whole, washed

1-2 jalapeno peppers, whole, washed

1 sweet bell pepper (any color – but, you know me!  RED rules) yeah, yeah – whole, washed

1 red onion, quartered

1 head garlic,  outer papery skin removed, then cut in half, longitudinally

1 lime, washed and halved

photo 1 (1)

Turn on your broiler and slide this crazy, Mexican deliciousness into the oven on a low rack.  The skin from the peppers is going to blister and blacken.  That’s cool!  Every 5 minutes or so, take your tongs and turn the peppers to expose other sides of the peppers.  You can flip the tomatillos but just leave the garlic, onion and lime alone – they’ll be fine.  photo 3

Once the peppers are softened and have released their juicy love (about 30 minutes oventime) use your tongs to remove the peppers and place them into an airtight container.  Slap the lid on and wait while the pepper skins steam loose.  At this point I just turn off the oven and let the tomatillos, garlic, lime and onion continue to break down slowly.  After about 10 minutes, remove the lid on the pepper container and peel off the blackened skins.  Remove and discard stems and large sections of seeds.  Place the flesh of the peppers into a large bowl.  Don’t worry about some seeds going in but, I do like to take out the biggest masses of them.  And, I should mention here, not all the skin is going to come off.  Just remove the black and easy-to-peel-off parts.  Some skin, some seeds, just go with however it seems to feel right.  You can’t mess this up.  Squeeze the garlic out of the head, squeeze the lime pulp out into the bowl with the pepper flesh.  Add the tomatillos, onion and all the liquid from the roasting pan and pour it all into the large bowl.  You now want to transfer this to a food processor.  A blender or immersion blender will probably work, as well.  Work in batches to keep from overloading.  I add about 1 tsp. salt and 1 tsp. smoked cumin.  That’s it!  Taste it – add anything that’s missing.  My notes say “Good on everything.”  You can use this sauce on eggs, enchiladas, tostados, beans — OH!  make huevos rancheros with this – you will thank me later!

Standard