Broiled Salmon Fillet

photo 2 (19)

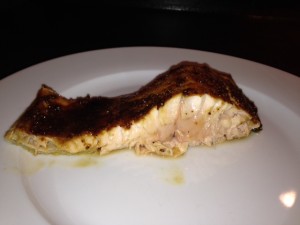
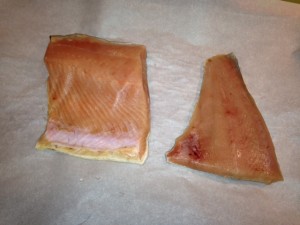
How have I not posted about salmon before?  It’s a definite favorite.  My Dad spent a summer working on a fishing boat in Alaska and we got hooked (sorry!) off his surplus of line-caught salmon.   The secret for perfectly cooked fish is having it completely thawed before it goes into the oven and not overcooking.  TIME in the heat is the process that develops the “fishiness factor” so, cook it fast and hot.  Pre-heat your oven to 400 degrees, lay the fillet on parchment paper (skin-side down) and prepare the glaze.

photo 3 (13)photo 1 (17)photo 2 (18)

In a small bowl mix:

1 Tbsp. spicy, whole-grain mustard

1 Tbsp. molasses

Stir together and smear over the top of the salmon.  Season with a nice sprinkling of salt and freshly ground pepper.photo 4 (10)

Place your pan into the oven on a middle rack and turn the broiler on.   Allow to broil for 5-7 minutes, depending on the thickness of the fillet.  Turn the pan around for even browning and watch closely.  You want color and sizzle but not blackening.  Ideally, there’s some degree of gradation toward the middle of the salmon but it takes a bit of finesse to pull this off.  It’s gonna be delicious, either way!    Oh, the tender flesh, the sweet from the molasses and the spiciness of the mustard!  Bliss, pure bliss.photo 5 (11)

This recipe is so simple and delightful I hope you will try it – even if you “think you don’t like fish”.photo 3 (14)

Standard

Razzle Dazzle

I gave up soda years ago.  Caffeine makes me jumpy.  Yet, who doesn’t *want* a little something tasty to sip in the afternoon?  My solution:  I came with up something delicious and refreshing out of fresh, healthful ingredients so I didn’t want or miss the sugar/acidic/bad-for-you gunk I used to drink before I gave a rip about my health.  You can make this in less than 3 minutes.  Try it!!

photo 1 (16)

1 fresh lemon

1 fresh lime

2 fresh clementines (like Cuties or whatever is in season).

photo 2 (17)

Cut citrus fruits in half and squeeze into a quart jar. photo 3 (12)photo 4 (9)

Fill with fresh, filtered water.  If you prefer a sweetened drink, add stevia or raw sugar to taste.  Drink over ice or at room temp.  Completely lovely.  Even lovelier if you have a sprig of fresh mint.photo (6)

NOTE:  I did not come up with the name for this.  That honor goes to a dear friend of mine.  Her son had moved home for a time and she made this for him.  When he’d ask for it, he’d say “Mom, could we make some Razzle Dazzle?”  Thank you, Jonas.  I believe we can!

Standard

Chicken Pot Pie

IMG_0806

It’s COLD!  And, when it’s really cold, sometimes you just need some real, comforting home food to warm you up from the inside out.  We only make this dish about once a year, but my husband has been campaigning for it lately.  He makes the crust and I make the filling.  Can’t ask for a better deal!

To begin:  stew a chicken

I do this in the slow cooker.  In the morning, I place 1/4 onion, 3 cloves garlic, 1/2 lemon and 1 cup filtered water in the slow cooker.  Add a rinsed, clean chicken.  Salt and pepper go on top.  Place the lid on tightly, turn the heat to high and let it go.  In the afternoon, skin and bone the chicken.  Filter the veggies out of the cooking liquid and keep the broth!  You won’t use it all in this dish but, it will be fantastic in soup or any recipe calling for chicken broth.

Once the chicken meat is set aside, begin preparing the filling.  OH MY GOSH!  You’re going to need a crust.  See?  That’s where teamwork comes in.  My hubby makes the holiday pies and any pie crusting that goes on comes from him.  Here’s an excellent resource on the process he uses and the recipe he uses from Cooks Illustrated:

http://food52.com/recipes/24966-cook-s-illustrated-foolproof-pie-crust

NOTE: This recipe makes 1 crust – for a double crust, double the recipe.  You will need to double for chicken pot pie.

It’s now the only pie crust he makes.  Perfect for sweet or savory dishes.  So, get *someone* to do the crust and give it time to chill for a couple of hours in the fridge before assembly.

Back to the filling:

6-7 white, button mushrooms, diced small

1 cup thin sliced celery

1 cup carrot “squares”  – he who makes the crust insists they must be squares like the bought ones he *used* to eat – suit yourself and your eaters

Now, this is chicken pot pie.  Use rendered chicken fat if you have it.  Don’t skimp!  I use about 2 Tbsp.  Heat the pan, add the fat, S&P and cook all the veggies til tender.  It will take 10-15 minutes on medium low heat.  They don’t need to brown and they should not be crunchy in this dish.  Once the veggies are perfect, make a roux.  To the tender veggies, add 2 Tbsp. flour.  Cook and stir for 1-2 minutes.  Then, using your saved chicken broth (about 1 cup) turn the filling into pure decadence.  Stir to combat lumpage!  Add in about 1 1/2 cups chopped chicken.  Stir to combine and let the whole mess of loveliness come to simmer.  Now, add in 3/4 cup frozen peas.  Turn the heat off and spoon in 1/2 cup full fat plain Greek yogurt.  Taste it.  Oh yeah.  Correct seasonings, if needed.

Roll out the bottom crust and place into pie pan.  Pour in the filling.  Top with remaining crust, cutting some vent holes.  Into a 425 degree preheated oven it goes!  Let it cook for about 10 minutes then lower the heat in the oven to 400 and cook another 30 minutes or until beautifully golden.  Now, here’s the hard part, it should set for about 10 minutes before you slice into it.  If you can hold off, good for you!  It will pull up all the liquids and make perfect slices.  Either way, enjoy!   IMG_0808

We certainly did!  :0

As you can see, we only have finish pics of this dish.  I’ll do better next time!


Standard

Salty Dogs

photo (5)

I love this cocktail.  Let me qualify that:  I love the version my husband makes.  I love him, too.  Even so, nobody makes a better Salty Dog.  Today I share his technique with you.

Start with fresh grapefruit.  photo 1 (10)

Four grapefruit will make about 3 drinks so plan your squeezing accordingly.  The grapefruits!  What did you think I meant??

Squeeze the juice – I have a little juicer component on my favorite kitchen workhorse.

It comes in super handy for this.  photo 2 (10)

photo 4 (5)

To your favorite glass (this one came from New Mexico and if it ever gets broken I will cry!) add crushed ice all the way to the top.  Add a squeeze of lime to the ice.

photo 5 (7)

To this, mix 1 part vodka to 3 parts freshly squeezed grapefruit juice.  Finish with a couple of grinds of superfine fresh ground salt.

Tink!  (that’s the sound of the glasses clinking together)

Note:  You can make this drink with store-bought juice but, it’s not the same.  If you do – omit the salt.  Processed juice is salty enough.  If you use something like Ruby Red (from the non-refrigerated section) it will be much sweeter than the authentic, fresh version.  If you must use bought juice, I recommend Simply Juice from the cold section of your store – it’s not the same, but will do in a pinch.

Standard

Pumpkin 101 and Creamy Pumpkin Soup

photo 1 (11)

Gorgeous!  Besides that, pumpkins are full of beta carotene, fiber and tons of nutrients.  This one was used for decorating at the studio (and one awesome Halloween workout) where I teach Pilates.  You can buy special cooking pumpkins that are smaller and easier to manage.  However, I hate waste and I do love a challenge, so I now have several of these bad boys.  (Thanks, Weavermans!)  First, we must get it into manageable-sized chunks.  I took my sharpest kitchen knife and began slicing downward from the top.  photo 2 (11)

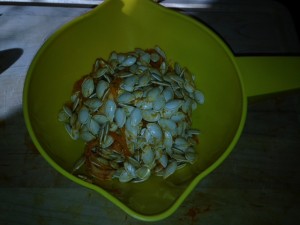
Continue doing this all the way around the pumpkin, then, make a short cut at the top below the stem to connect the long cuts and you will have pumpkin wedges.  photo 3 (6) Using a large spoon, scrape out the seeds and stringy fibers.  (Don’t throw them away – we need them later on for homemade granola!)  photo 5 (8)  photo 3 (8)

Once you have all the insides cleaned out, place your pumpkin wedges into a large roasting pan and place into a pre-heated 400 degree oven.  photo 2 (12) This will need to roast for about an hour.  When the flesh is tender enough to pierce easily with a fork, just turn the oven off.  Leave the door closed and let the pumpkin sit until it’s cool enough to work with – about another 45 minutes to an hour.  It will have browned in some place and softened considerably by this time.  photo 4 (6)

Take a wedge and use another large spoon to scoop as close to the skin as you can and remove the delicious pumpkin flesh.

photo 1 (12)photo 2 (13) You can see there are still some connective fibers left over from the seed removal.  That’s alright.  Everything is tender and they won’t even be detectable.  With all sections scraped, you end up with a LOT of perfectly golden, tender pumpkin that beats the socks off canned for flavor and texture in any recipe you have for pumpkin.

photo 4 (7)

And, since we have already gone this far.  And, since you KNOW how much I adore soup.  Let’s just make some right quick.

Into a large stock pan, place 2-3 Tbsp. of fat.  (I am using chicken fat, but butter, coconut oil or a combo are just fine.)  Add 2 big pinches of turmeric to enhance the beautiful golden color and add in some fabulous anti-oxidants plus 1 tsp. salt and 1/4 tsp. pepper.

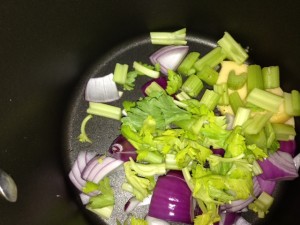
Now, the aromatics.  I used 1/2 red onion, roughly chopped and 4-5 sticks of celery, roughly chopped.  Add to pan on medium – high heat.

photo 2 (14)

I am making 10 servings (about 1 cup each) of soup.  If you wish to make less, or more, adjust accordingly.


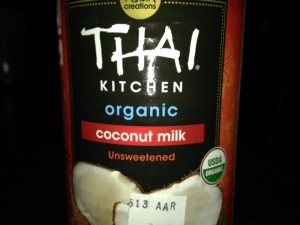
Once your aromatics are tender, add the pumpkin flesh (in my case, about 7-8 cups).   The pumpkin is already cooked, we just want this all to come together.  We need liquid and decadence:  organic coconut milk! photo 4 (8)photo 5 (9)

Perfect.  Put the whole can in there.  Then, 2-3 cups of chicken broth.   photo 1 (14)  The coconut milk will soften and add unbelievable creaminess and up the satiety factor by a zillion.  When everything has come up to a simmer, check and see if your consistency is about right.  Remove from heat and whip out your immersion blender.  Blend until perfect.  photo 5 (10)

Taste for seasonings and adjust to your preference.  Serve and bask in the glory!  photo 1 (15)

Note:  This can easily be made vegan.  Use coconut oil for fat and vegetable broth or water for additional liquid.


Standard

Saturday Eggs

photo (4)

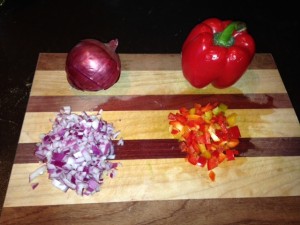
Oh, how I LOVE weekends!  We eat breakfast daily but, on weekends, it can be a little later, a little more relaxed and even a little tastier!  We call these Saturday eggs but they can be enjoyed on any day of the week.  Customize this to suit your families preferences – this is just a process.  If you want potatoes, add potatoes.  For more heat, use jalapenos.  Got some mushrooms that need to be used up?  Chop them and toss them in.  You get the idea.  You can expand this to feed a crowd.  For today, I am feeding 2, and we’ll have no trouble eating all this!  I just so happened to have red pepper,  purple onion and bacon on hand and that’s how these evolved.  photo 1 (7)

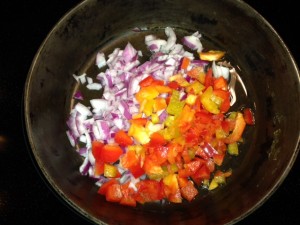
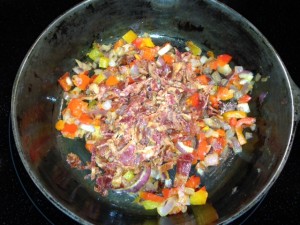
Heat your skillet to low-medium.  To the hot skillet, spoon in 1-2 Tbsp. bacon grease.  Then, add your chopped veggies.  photo 4 (3) I used about 1/3 cup of each.  Add a little salt and pepper and let them go, stirring occasionally.  Cook 10-15 minutes until the water is released from the veggies and they are soft – can’t have crunchy bites in your eggs, now can we?  The lower and slower these cook, the sweeter the onions and peppers will get.  When the veggies are “there” with maybe some browning to the edges, add your pre-cooked bacon* {see previous post BACON}.  Again, I used about 1/3 cup, chopped fine.  photo 1 (8)

Now, the eggs.  photo 2 (8) Add salt and pepper and whip them up! photo 3 (4)

photo 1 (9)photo 5 (5)

And, into the pan they go!photo 2 (9)

When the eggs are about half-set, add in a handful of grated cheese.  photo 4 (4)

Continue cooking and stirring gently, bringing cooked parts up and letting egg liquid get to the heat at the bottom of the pan.  Remove from heat and serve!  photo 5 (6)

*Note:  If your bacon is raw, simply cook it in the same skillet at the start.  It will render the fat needed for the veggies.  Once the bacon is done, remove it from the pan.  Allow to cool and chop.  Return it to the same pan as described above.


Standard

BACON!!

I wanted to name this post “Baking Bacon” but, really, what’s better than BACON?  It’s considered the gateway meat for vegetarians… I know!  I was a vegetarian for 4 years… just not a very good one.  On to the bacon ~ the mess!  Oh my, any cook that also battles cleanup will a) use fewer dishes and b) find ways to splatter less.  This process keeps your cooktop completely grease-free.

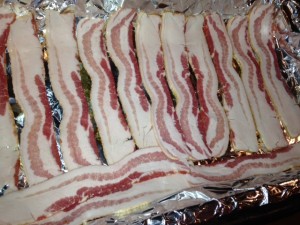
Turn your oven to 400 degrees.  Lay the bacon onto a large roasting pan in a single layer

(I line mine with foil for easy cleanup).  photo 2 (6)

Place into oven and give it about 15 minutes.  Some of the edge pieces will cook faster so be ready to pull individual slices.  Tongs work perfectly for this.

photo 3 (3)  Cook til done.  It can go from not quite done to overdone in moments – so watch carefully the closer it gets to your liking.  I tend to cook in batches.  This allows me to cook an entire package of bacon and pull out a piece or two, as needed, during the week.  photo 5 (3)  Store in the refrigerator in an airtight container.  This also freezes perfectly.

My husband sent me a pic of how he and his hunting buddy cook bacon at deer camp.  This is great for open fire cooking.

Check this out:  IMG_0795

He’s been watching!!  😉

Standard

Sauteed Kale and Eggs

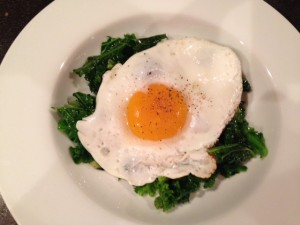
Meet my new favorite breakfast!photo 2 (5)

Kale and eggs – if you haven’t eaten greens for this most important meal of the day… Well, what are you waiting for?  They are freaking delicious.  The first time I had cooked greens for breakfast was in Jamaica – I found out it’s OK.  Other cultures *apparently* do this, so don’t be afraid of a little out-of-the-ordinary culinary excursion.

Besides being my favorite breakfast food, eggs are nutritional powerhouses.  Out-dated nutritional advice shuns eggs.  Jump into the new millennium and experiment with all the fabulous superfoods – starting with eggs!

Recipe:  with so few ingredients, it’s really important to not skimp on quality here!

eggs, 1-2 per person (free pastured, local eggs are best)

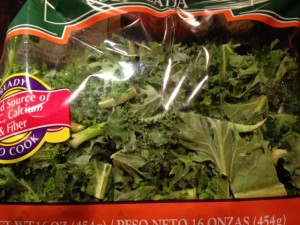
kale, 1 big handful per person (organic, pre-chopped in the bag is a major time-saver)

photo 3 (1)

fat, 1 tsp. (bacon grease, butter, coconut oil or a combo of these)

salt (Himalayan pink salt, sea salt)

Heat a cast iron skillet on medium low for 5 minutes. photo 1 (6)

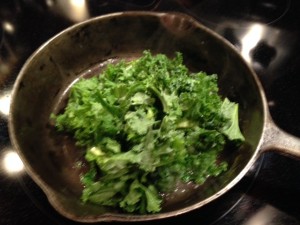
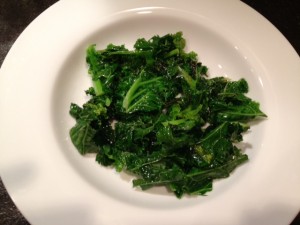
To the hot pan, add your choice of fat.  I use about 1 teaspoon bacon grease.  Add 1 big handful of chopped kale and salt.

photo 2 (3)

It will spit and sputter from the moisture on the greens and that’s OK.  Saute the kale 2-3 minutes or until you get a deepening in color and they wilt reducing the volume by about half.  You may get some “cooked” spots on the kale, that is just fine, as well.  Remove the kale to serving plate.

photo 4 (2)

If the greens have absorbed all the fat, add a bit more.  Gently crack 1-2 eggs into same skillet.  photo 5 (2)

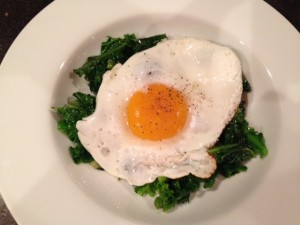
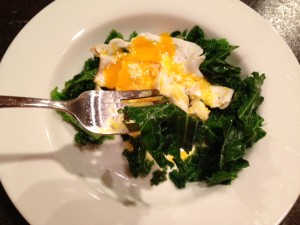
Don’t move ’em, don’t touch ’em at all!  Add salt (and pepper, if desired).   When cooked to your preference, gently slide a spatula under the eggs and place right on top of the kale.  Beautiful!  Delicious!  Nutritious!  Bon Appetit!

photo 2 (4)photo 3 (2)

That’s it!  How simple and way faster than driving through some scary clown establishment.  Feed yourself, feed your kids and enjoy!

A final word about salt:  If you don’t think you like greens, try adding some salt.  Go easy – it’s way easier to add than it is to take out.  Remember your greens will shrink by about half, so when you salt, salt for about half the amount you normally would.  Very often there is a bitterness associated with greens, like kale.  Salt will reduce the bitterness.  So, get high-quality, natural salt (not bleached and processed) and use it to enhance your greens!

Standard

Slow Cooker Anasazi Bean and Veggie Soup

Ok – it doesn’t *have* to be Anasazi beans, any bean will do.  But, my Mom loves these beans and she gave me some while my family was visiting over the holidays.   Anasazi beans are kissing cousins to pinto beans and the recipe will work in a straight substitution.  The Anasazi beans are a little sweeter and cook a little faster than pintos. If you use a different size/variety/density bean (or even peas!) just follow the cooking directions on the package.

Here’s mine:  photo 1 (2)

Sort and wash 1lb. of Anasazi beans, removing any weird, stray bits or rocks (if you skip this step, don’t come whining to me when you get the debris!).

Some folks soak, some folks don’t.  I go either way, depending on time and energy before serving.  These, I soaked in cold water for a couple of hours.  Drain off the soaking water, then into the slow cooker they go.  Add cold, filtered water to cover and nothing else!  I mean it, NOTHING ELSE.  Here’s my very best bean-cooking tip:  Cook your beans in water only!  Seriously, if you go adding salt (this includes salty ham bone or stock) it will inhibit the tenderization of the beans.  Save your fat, salt, veggies and especially tomato products til the beans are as tender as you wish.  Then, we party!

Turn the slow cooker on high and go to work, take a nap or wash the dog.  (If you prefer to cook beans overnight, and I often do, skip the soak.  Don’t skip the sort!   Throw the rinsed beans in the slow cooker, cover with water {use about 2 times the volume of beans}, turn on low and go to bed.  In the morning, you will have tender beans just begging for some salt, veggies and whatever general loveliness you can dream up.)   OK, back to tonight’s meal:  check the beans for desired tenderness in 4-6 hours.  In my life, this works out to my lunch break.  They were perfectly tender and I added:

1/2 chopped onion

1 chopped red pepper

1 chopped Anaheim pepper

4 cloves garlic, minced

1 stick celery, chopped

and, 1 head of broccoli*, chopped (only because I needed to use it up – you can use virtually ANY veggie here – clean out your fridge, use what makes you happy!)

Here’s what we have:  photo 2 (2)

To this, I added a ham bone (also from Christmas) and turned the setting to low for the afternoon.  If you are not adding a salt factor like a ham bone, you will need to add salt here.  Start with a teaspoon and go from there, adjusting to your preference.  When we walk in the door from a long day, it will be lovely, hearty and full of fiber.  The bits of ham will fall off the bone and *BONUS* morph this soup into something wonderful.   The best part of this meal is the add-ins.  I dice fresh onion and avocado as toppers.  My husband will spoon in a bit of sour cream – oh, if only I had some flat-leaf parsley!  Either way, you won’t go wrong.  This bean and veggie soup will do just fine on its own or, if you are wanting to show off a little – bake a pan of corn bread and dine like Royalty!

*Rookie mistake:  if I had been thinking when I chopped my veggies, I would have saved the broccoli, chopped it small and added it right before serving.  The heat from the simmering soup would turn it bright green, slightly crunchy and perfect.   Next time…

P.S.  So, I didn’t have parsley, but I DID have spinach!  photo 4 (1)
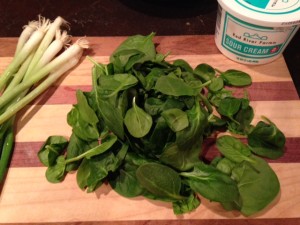
When things cook all day, I think it’s really important to have something fresh to add in right at the end.  So, here’s how I served the Anasazi bean and veggie soup:  photo 5 (1)  photo 1 (4)
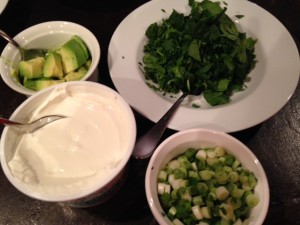
We had minced spinach (organic, please), green onions (also, organic), diced avocado and sour cream to customize to individual preference.  It was really good!
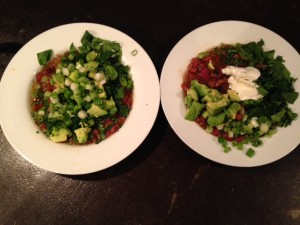
photo 1 (5)

Standard