BACON!!

I wanted to name this post “Baking Bacon” but, really, what’s better than BACON?  It’s considered the gateway meat for vegetarians… I know!  I was a vegetarian for 4 years… just not a very good one.  On to the bacon ~ the mess!  Oh my, any cook that also battles cleanup will a) use fewer dishes and b) find ways to splatter less.  This process keeps your cooktop completely grease-free.

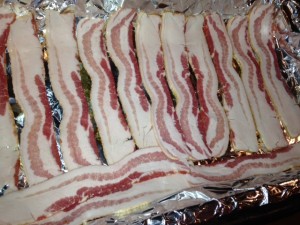
Turn your oven to 400 degrees.  Lay the bacon onto a large roasting pan in a single layer

(I line mine with foil for easy cleanup).  photo 2 (6)

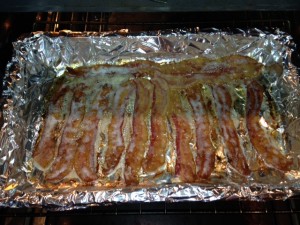
Place into oven and give it about 15 minutes.  Some of the edge pieces will cook faster so be ready to pull individual slices.  Tongs work perfectly for this.

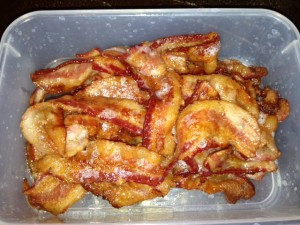
photo 3 (3)  Cook til done.  It can go from not quite done to overdone in moments – so watch carefully the closer it gets to your liking.  I tend to cook in batches.  This allows me to cook an entire package of bacon and pull out a piece or two, as needed, during the week.  photo 5 (3)  Store in the refrigerator in an airtight container.  This also freezes perfectly.

My husband sent me a pic of how he and his hunting buddy cook bacon at deer camp.  This is great for open fire cooking.

Check this out:  IMG_0795

He’s been watching!!  😉

Standard

Sauteed Kale and Eggs

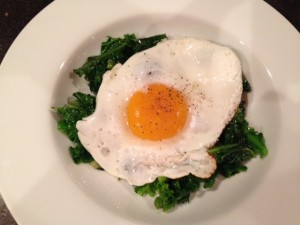
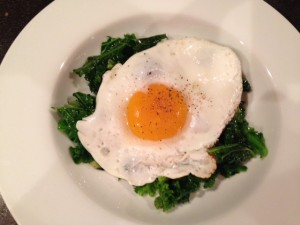
Meet my new favorite breakfast!photo 2 (5)

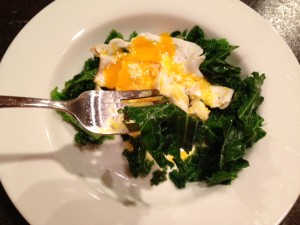
Kale and eggs – if you haven’t eaten greens for this most important meal of the day… Well, what are you waiting for?  They are freaking delicious.  The first time I had cooked greens for breakfast was in Jamaica – I found out it’s OK.  Other cultures *apparently* do this, so don’t be afraid of a little out-of-the-ordinary culinary excursion.

Besides being my favorite breakfast food, eggs are nutritional powerhouses.  Out-dated nutritional advice shuns eggs.  Jump into the new millennium and experiment with all the fabulous superfoods – starting with eggs!

Recipe:  with so few ingredients, it’s really important to not skimp on quality here!

eggs, 1-2 per person (free pastured, local eggs are best)

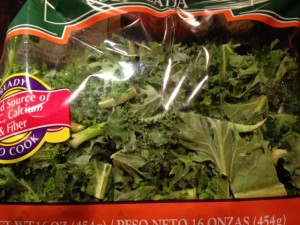
kale, 1 big handful per person (organic, pre-chopped in the bag is a major time-saver)

photo 3 (1)

fat, 1 tsp. (bacon grease, butter, coconut oil or a combo of these)

salt (Himalayan pink salt, sea salt)

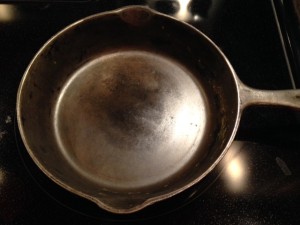
Heat a cast iron skillet on medium low for 5 minutes. photo 1 (6)

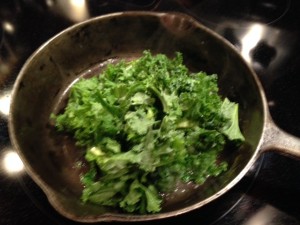
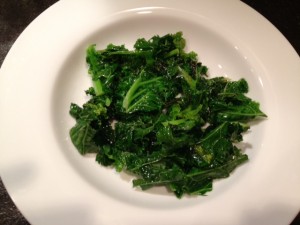
To the hot pan, add your choice of fat.  I use about 1 teaspoon bacon grease.  Add 1 big handful of chopped kale and salt.

photo 2 (3)

It will spit and sputter from the moisture on the greens and that’s OK.  Saute the kale 2-3 minutes or until you get a deepening in color and they wilt reducing the volume by about half.  You may get some “cooked” spots on the kale, that is just fine, as well.  Remove the kale to serving plate.

photo 4 (2)

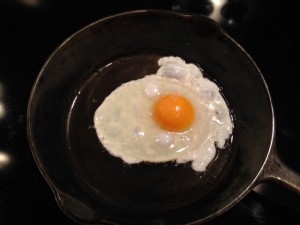
If the greens have absorbed all the fat, add a bit more.  Gently crack 1-2 eggs into same skillet.  photo 5 (2)

Don’t move ’em, don’t touch ’em at all!  Add salt (and pepper, if desired).   When cooked to your preference, gently slide a spatula under the eggs and place right on top of the kale.  Beautiful!  Delicious!  Nutritious!  Bon Appetit!

photo 2 (4)photo 3 (2)

That’s it!  How simple and way faster than driving through some scary clown establishment.  Feed yourself, feed your kids and enjoy!

A final word about salt:  If you don’t think you like greens, try adding some salt.  Go easy – it’s way easier to add than it is to take out.  Remember your greens will shrink by about half, so when you salt, salt for about half the amount you normally would.  Very often there is a bitterness associated with greens, like kale.  Salt will reduce the bitterness.  So, get high-quality, natural salt (not bleached and processed) and use it to enhance your greens!

Standard

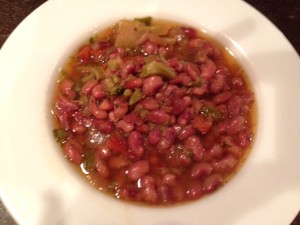
Slow Cooker Anasazi Bean and Veggie Soup

Ok – it doesn’t *have* to be Anasazi beans, any bean will do.  But, my Mom loves these beans and she gave me some while my family was visiting over the holidays.   Anasazi beans are kissing cousins to pinto beans and the recipe will work in a straight substitution.  The Anasazi beans are a little sweeter and cook a little faster than pintos. If you use a different size/variety/density bean (or even peas!) just follow the cooking directions on the package.

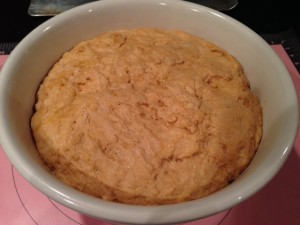
Here’s mine:  photo 1 (2)
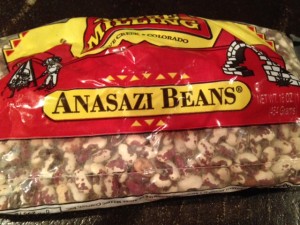
Sort and wash 1lb. of Anasazi beans, removing any weird, stray bits or rocks (if you skip this step, don’t come whining to me when you get the debris!).

Some folks soak, some folks don’t.  I go either way, depending on time and energy before serving.  These, I soaked in cold water for a couple of hours.  Drain off the soaking water, then into the slow cooker they go.  Add cold, filtered water to cover and nothing else!  I mean it, NOTHING ELSE.  Here’s my very best bean-cooking tip:  Cook your beans in water only!  Seriously, if you go adding salt (this includes salty ham bone or stock) it will inhibit the tenderization of the beans.  Save your fat, salt, veggies and especially tomato products til the beans are as tender as you wish.  Then, we party!

Turn the slow cooker on high and go to work, take a nap or wash the dog.  (If you prefer to cook beans overnight, and I often do, skip the soak.  Don’t skip the sort!   Throw the rinsed beans in the slow cooker, cover with water {use about 2 times the volume of beans}, turn on low and go to bed.  In the morning, you will have tender beans just begging for some salt, veggies and whatever general loveliness you can dream up.)   OK, back to tonight’s meal:  check the beans for desired tenderness in 4-6 hours.  In my life, this works out to my lunch break.  They were perfectly tender and I added:

1/2 chopped onion

1 chopped red pepper

1 chopped Anaheim pepper

4 cloves garlic, minced

1 stick celery, chopped

and, 1 head of broccoli*, chopped (only because I needed to use it up – you can use virtually ANY veggie here – clean out your fridge, use what makes you happy!)

Here’s what we have:  photo 2 (2)

To this, I added a ham bone (also from Christmas) and turned the setting to low for the afternoon.  If you are not adding a salt factor like a ham bone, you will need to add salt here.  Start with a teaspoon and go from there, adjusting to your preference.  When we walk in the door from a long day, it will be lovely, hearty and full of fiber.  The bits of ham will fall off the bone and *BONUS* morph this soup into something wonderful.   The best part of this meal is the add-ins.  I dice fresh onion and avocado as toppers.  My husband will spoon in a bit of sour cream – oh, if only I had some flat-leaf parsley!  Either way, you won’t go wrong.  This bean and veggie soup will do just fine on its own or, if you are wanting to show off a little – bake a pan of corn bread and dine like Royalty!

*Rookie mistake:  if I had been thinking when I chopped my veggies, I would have saved the broccoli, chopped it small and added it right before serving.  The heat from the simmering soup would turn it bright green, slightly crunchy and perfect.   Next time…

P.S.  So, I didn’t have parsley, but I DID have spinach!  photo 4 (1)
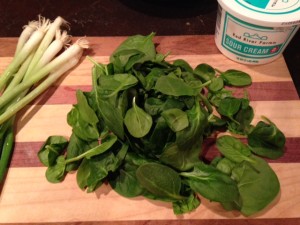
When things cook all day, I think it’s really important to have something fresh to add in right at the end.  So, here’s how I served the Anasazi bean and veggie soup:  photo 5 (1)  photo 1 (4)
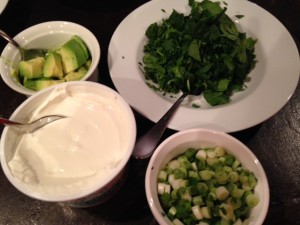
We had minced spinach (organic, please), green onions (also, organic), diced avocado and sour cream to customize to individual preference.  It was really good!
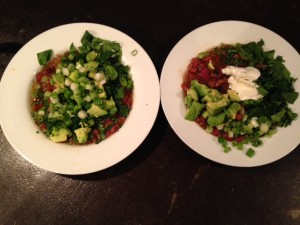
photo 1 (5)

Standard

Roasted Tomatillo Salsa

Our little 3 1/2 year old niece calls this “sauce sauce”.  We all think it’s crazy good.

photo 4

And, it’s simple to make.  Just come with me.

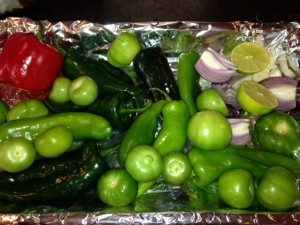
Take a large roasting pan and line it with heavy duty foil.  Into this, place the following:

1 1/2 lbs. tomatillos, papery skins removed, then washed

4-5 poblano peppers, whole, washed

4-5 Anaheim peppers, whole, washed

1-2 jalapeno peppers, whole, washed

1 sweet bell pepper (any color – but, you know me!  RED rules) yeah, yeah – whole, washed

1 red onion, quartered

1 head garlic,  outer papery skin removed, then cut in half, longitudinally

1 lime, washed and halved

photo 1 (1)

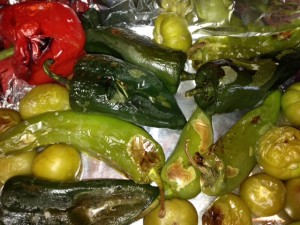
Turn on your broiler and slide this crazy, Mexican deliciousness into the oven on a low rack.  The skin from the peppers is going to blister and blacken.  That’s cool!  Every 5 minutes or so, take your tongs and turn the peppers to expose other sides of the peppers.  You can flip the tomatillos but just leave the garlic, onion and lime alone – they’ll be fine.  photo 3

Once the peppers are softened and have released their juicy love (about 30 minutes oventime) use your tongs to remove the peppers and place them into an airtight container.  Slap the lid on and wait while the pepper skins steam loose.  At this point I just turn off the oven and let the tomatillos, garlic, lime and onion continue to break down slowly.  After about 10 minutes, remove the lid on the pepper container and peel off the blackened skins.  Remove and discard stems and large sections of seeds.  Place the flesh of the peppers into a large bowl.  Don’t worry about some seeds going in but, I do like to take out the biggest masses of them.  And, I should mention here, not all the skin is going to come off.  Just remove the black and easy-to-peel-off parts.  Some skin, some seeds, just go with however it seems to feel right.  You can’t mess this up.  Squeeze the garlic out of the head, squeeze the lime pulp out into the bowl with the pepper flesh.  Add the tomatillos, onion and all the liquid from the roasting pan and pour it all into the large bowl.  You now want to transfer this to a food processor.  A blender or immersion blender will probably work, as well.  Work in batches to keep from overloading.  I add about 1 tsp. salt and 1 tsp. smoked cumin.  That’s it!  Taste it – add anything that’s missing.  My notes say “Good on everything.”  You can use this sauce on eggs, enchiladas, tostados, beans — OH!  make huevos rancheros with this – you will thank me later!

Standard

Roasted Veggies

photo 2

How can you make almost any vegetable sweeter and more delicious?  Through the magic of oven roasting!!  There is nothing easier.  I put these quartered sweet potatoes and broccoli on time bake and had hot, fresh sides walking in the door last night.  Broil some salmon and in 10 minutes, you have a fabulous meal.  All you do is wash and cut your vegetables into desired sizes.  I line the baking pan with aluminum foil to make cleanup a snap.   Drizzle on olive oil (butter or coconut oil work great, too), sprinkle with sea salt and Voila!  You can do this process with almost any vegetable, varying the cooking times.  For potatoes and starchy or very firm veggies, roast at 400 degrees for 45 minutes to an hour.  For squash and zucchini shorten the cooking time to 30 minutes or so.  The broccoli gets a little dark in places but we ♥ it that way.   Try Brussels sprouts!  We love ’em!


Standard

Green Eggs and Ham Fritatta

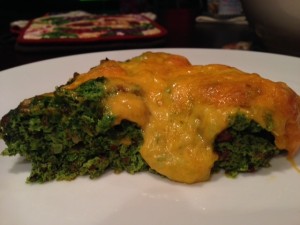
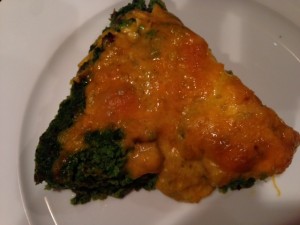
Move over, Dr. Suess!  This is what I’m talking about:  fritslice

What you have here is a protein-packed powerhouse of nutrition using a ton of kale, farm-fresh eggs, ham and cheddar cheese.   A fritatta is an Italian baked omelet.  It is easy and delicious.  Let’s make one!!

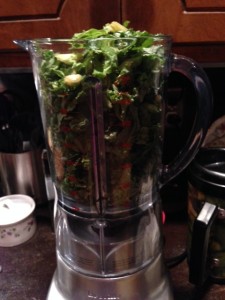
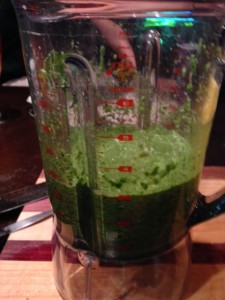
Start by packing  your blender full of kale greens,

about 8 oz.  kale

You will need to add liquid (water or milk) to liquify the kale.  Start with 1/4 cup of liquid and add more as needed.  frit2frit3

Now, add in the eggs.  For this big ole fritatta, you need a full dozen farm fresh eggs.  Look at the color of those yokes!  You don’t find that at the grocery store!!   Add the eggs to your blender along with 1 tsp. salt and 1/2 tps. black pepper and pulse a few times to incorporate.

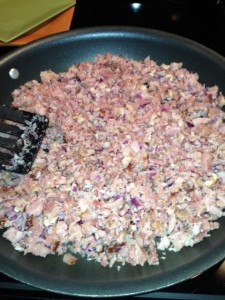
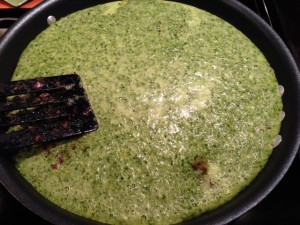
Meanwhile, finely chop 1.5 cup of ham and a red onion.  frit4 Cook this over medium heat in a large non-stick skillet with a tsp. of butter to brown the ham and soften the onions.  This will take about 7 minutes.  Now would be a good time to pre-heat your oven to 350 degrees.  Once the meat is browned to your liking turn the heat to low, add the green eggs to the pan.  frit5

As the eggs begin to set, gently stir and let the all the ingredients become friends.  Because you have added more liquid (from the kale and water/milk) it will be a little looser than “just eggs” so let it go til you think it’s about half-way set.  frit6

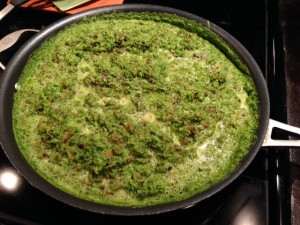
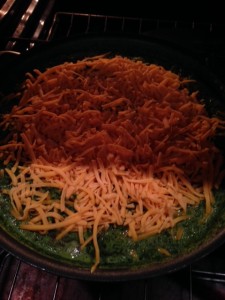
Top this with 1 cup (or more, I won’t tell!) of grated cheddar cheese and slide the whole thing into your preheated oven.  frit7

Bake for 10-15 minutes until the center is mostly set and the cheese is melty.  Now, switch your oven to broiler and brown the top.  frit8 Don’t let it burn!  Just let it take on some broiler action loving!   Remove from heat and let it sit out for 10 minutes.  This allows any moisture to draw back into the fritatta and makes for beautiful slices.   frit9

Standard

Sourdough Bread using Tomato Juice

So, I have been debating whether or not to post this recipe.  It’s really delicious BUT, I don’t have a sourdough starter recipe.  There are plenty available on the Internet but, I received mine from a friend (Thank you, Bobbie A!) a number of years ago and have never started one from scratch.  I understand it’s easy – just as this bread is… And, I leave you on your own to discover the process.  (There is a GREAT book I just read by Michael Pollan called “Cooked”.  In it you will find excellent process instructions for a sourdough starter.)  Once you obtain your sourdough starter, you can make this simple bread. 

bread 

With only six ingredients, you have plenty of wiggle room to customize this very basic process. 

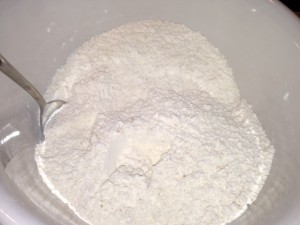
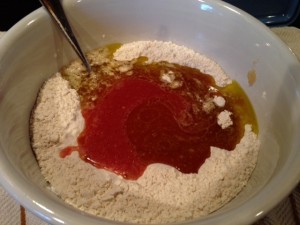
Begin with a large bread bowl.  Into your bowl, place 6 cups of bread flour.  For basic white and fluffy bread, use all 6 cups of unbleached white bread flour.  If you prefer a whole wheat blend, replace 2-3 cups with whole wheat flour to total 6 cups.  (Note:  using all whole wheat will make a very dark, dense and flat bread)  For this batch, I used 4 cups unbleached white flour and 2 cups amaranth flour.  To the flour, add 1 tsp. salt and 1 Tbsp. sugar. bread1

Stir the dry ingredients and make a well in the center. 

Then add: 

1/2 cup olive oil

1 cup tomato juice or 1 small can tomato juice + additional water to make 1 cup

1 cup sourdough starter bread3

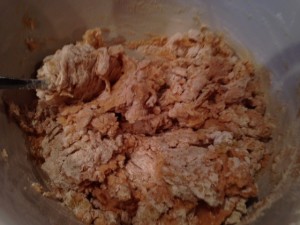
bread4 Now you begin to stir.  You can start with a large spoon but, at some point, you are just going to have to get your hands in there.  It makes a stiff dough and the right tools are your hands!!  This is about as far as I get with a spoon:  bread5 From here, get in there to get it smooth and worked together, cleaning the sides of the bowl and incorporating it all into a nice dough ball. 

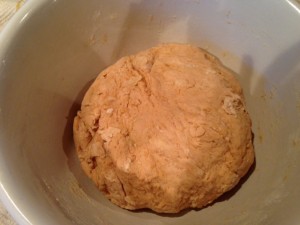
bread6

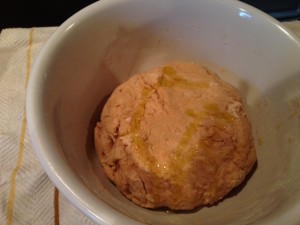
You can see, I am comfortable with a rustic bread.  I don’t want to overwork the dough (unless it’s for pizza!) so I just let it come together.  You might need to add a little water or flour here to get it right, just trust yourself.  Now, drizzle some olive oil onto the dough, about a teaspoon.  bread7Use your hands to spread the oil by patting it gently on the surface of the dough and then flip the ball so the oil-side is on the bottom.  This keeps it from sticking to your bowl and then flip again.  Your bowl is now lightly coated as is the dough. 

bread8 Cover the bowl tightly with aluminum foil and allow to rise about 12 hours, or overnight.  Sourdough is very forgiving.  Don’t worry about exact times, just take an occasional peek and when your dough has doubled in size, you are there! 

bread9 

Now, take the dough out of the bowl and place it onto a clean counter or dough mat that has a fine layer of flour.  Scrape all that deliciousness out and use your hands to get every bit!   Knead the dough ball and press out the air.  Knead about 10 times, turning a quarter turn each time.  If it’s too wet and sticky, add a bit of flour.  Now, you want to shape your loaves.  I like free-form loaves.  Use a sharp smooth-bladed knife and cut the dough in half.  Now cut each half into thirds.  bread10 Use flour as needed (especially on fresh cut sides) to keep dough workable.  Shape into rounds and place onto lightly greased baking sheets.  bread11 Using a sharp knife, score your bread in whatever pattern pleases you.  I use 2 straight lines.  Now, place the loaves into a warm place (I like the unheated oven) and allow to rise again.  Let it go 6 to 8 hours.  Here’s the second rising:  bread13  

Now you are ready to bake!  Turn the oven to 375 degrees and allow it to preheat fully.  Slide your loaves in and cook for 20-25 mins. or until golden.  I like to turn the pans halfway through to get even browning.  Here’s what you get:bread14bread

I hope you’ll try this sourdough.  You can make dinner-size rolls, pan loaves, breadsticks, twists or clover rolls.  You can add rosemary and garlic for a lovely Italian spin or orange zest and cardamom for a breakfast flavor.  Your options are as wide as your imagination.  Have fun.  Make bread! 


Standard

Green Beef Enchilada Casserole with SUPERVEGGIE Sauce

So, last night we were supposed to have a little mid-week family meal.  I made this to die for enchilada casserole and ended up splitting the meal into 2 batches… more on that later.  Anyway, they were so fur-reaking good I just had to share!  Just as fair warning… my final pic turned out really dark so it does NOT show how lovely this turned out. 
Start with the sauce.  Not any ole canned crap sauce either!  For SUPERVEGGIE Sauce you’ll need:

all this:  ench1

1 stick celery

4 large white mushrooms

2 Anaheim peppers (great color, low heat)

1 Poblano pepper (rich, fruity pepper, some heat)

1 bunch green onions

2 cloves garlic (not pictured)

Finely chop all above ingredients until they look like this:ench2Put it all into your largest skillet and cook over low-medium heat in 2 Tbsp. butter (organic, preferred).  It will sweat and release out the liquid and your kitchen is going to start attracting people in wanting to know “when do we eat?”  You’ll know you’ve got it going on, then!  Add salt (1.5 tsp.), black pepper (1 tsp), 2 pinches Turmeric and, if you have it, 1-2 tsp. New Mexico green chili powder.  It’s not a deal breaker but it adds a nice *something*.  

Do not use red chili powder – it will turn it into *something else* all together. 

Let this go for 15-20 minutes, stirring often.  You are not looking for browning here, just reduce the mass by about two-thirds.  If your skillet will hold it all, scooch the veggie-deliciousness to one side and add 1lb. ground beef (yes, you can use ground turkey, chicken or even venison!)  ench3 

Brown the meat. 

ench5ench5.1

Now, to turn this into a sauce, you will need flour. 

Add about 2 Tbsp.  ench6 

Incorporate this fully, cooking about 5 more minutes before proceeding.  Then, you will add liquid.  AND, you have CHOICES!  I used chicken stock.  You can use milk, chicken broth, beef broth, water or a combo of any of these liquids equaling about 1.5 cups.  Start by adding a cup of liquid.  If it’s right, stop there.  If it’s too thick , add some more liquid.  Remember, it’s going into a casserole so it’s OK if it’s a little loose here.  Let it come up to a bubble. 

Be patient and then taste for seasoning correction.   Turn off the burner. 

Now, you need to cream it up a bit.  I used Greek yogurt (full fat) but you may use sour cream as well. 

About 1/2 cup.   ench7

Stir it all together and you have *MAGIC*!  ench8 

NOTE:  If you need to cook the meat in a separate pan, no worries, mon!  Just layer it all together at the end.   I just happen to prefer washing one pan 😉 

Now, you will make the casserole.  Into a casserole dish — or 2 in my case– it goes!  I used a 12 inch round and an 8 inch round with 2 layers each.  I suggest a 12 inch round with 3 layers, but any shape will do.  Cut or tear corn tortillas into quarters and layer into the bottom.  Don’t worry about spraying the bottom, the sauce will keep it from sticking. ench9

 If your sauce is on the drier side, use fewer corn tortillas, maybe 6.  Mine was a little wetter so I used a little more here, about 8 total.  This is the best part of creative cooking – you get to feel your way!  Over this you will ladle the meat sauce.  ench10 Now top with grated cheddar cheese (or a Mexican blend).  Real cheese, please – none of that processed junk or cheese-product-in-a-jar!  Continue layers in this order until you run out of room or supplies.  Top with a nice layer of cheese (about 1/2 cup per layer) and a little extra on top.  And, into the oven it goes. 

350 degrees until bubbly. 

That’s it! enchend 

So, I have to apologize for the darkness in this pic.  That AND the fact that I didn’t get one after oven time.  Our family dinner for 6 morphed into a dinner for 4 and a takeout option for 2.  But, trust me, the casserole was divine! 


Standard

Cucumber Avocado Salad

Want fresh?  And delicious?  We got it!  cukepre I don’t know why it took me til this year to make this.  It’s crunchy and citrus-y goodness.  And simple.  Did I mention SIMPLE? 

Ingredients:

4 small English cucumbers (about 4 -5 inches in length)  if the little gourmet ones aren’t available, substitute 1 large English cucumber. 

1/4 red onion, sliced thin then chopped

1 large, ripe avocado

1 lemon or lime

salt

extra virgin olive oil

Cut the cukes in half, and then quarters, lengthwise.  Then chop the long quarters into small quartermoon shapes.  cuke1cuke2Dice up the onion slices.  Then, halve your avocado.  Keeping it in the shell, use a small paring knife to dice the avocado, scoring all the way to the skin. cuke4 cuke3 Then, use a spoon to scoop out the diced up avocado.  Everything goes into your bowl.  Add salt to taste (for us, about 1 tsp. Himalayan pink salt).  Squeeze the lemon or lime juice into your bowl.  Drizzle a circle of extra virgin olive oil into and gently fold it all together (to keep from destroying the avocado).  cukepreAnd, there you have it!  You can thank me later!

Standard