Chili Roasted Salmon with Pineapple Mango Relish

photo (33)

Here’s another use for the chili sauce (see previous post for Chili Sauce recipe) — basting your salmon filets!  Kinda Genius, I know, but we can’t let this great stuff go to waste!

So simple, this is all you need:

salmon filet

chili sauce

Coat the filet with chili sauce, good salt and freshly ground pepper.  Place into a pre-heated 350 degree oven and switch to broil.  Broil 5-7 minutes for until flesh flakes easily and cooked to your preference.

While preheating your oven, prepare the relish.

1 cup pineapple, diced

1 mango, diced

1/3 red onion, minced

1/3 red pepper

1 jalapeno pepper (for more heat) or 1/2 Poblano pepper (for less heat), diced

juice of lime

1 tsp. Himalayan salt

drizzle of olive oil

Combine all relish ingredients in a small bowl.  Stir gently to combine.

Serve with relish over salmon and give yourself a nice pat on the back!  See, this cooking thing isn’t so hard!

Standard

Chicken Soft Tacos with Mango Salsa and Chili Sauce

photo (32)

Can I just tell you how crazy good these are?  Good enough that when we have them, my husband says “why do we not eat this more often?”  So, so good!

Let’s start with the salsa so the flavors can come together while we do the rest.
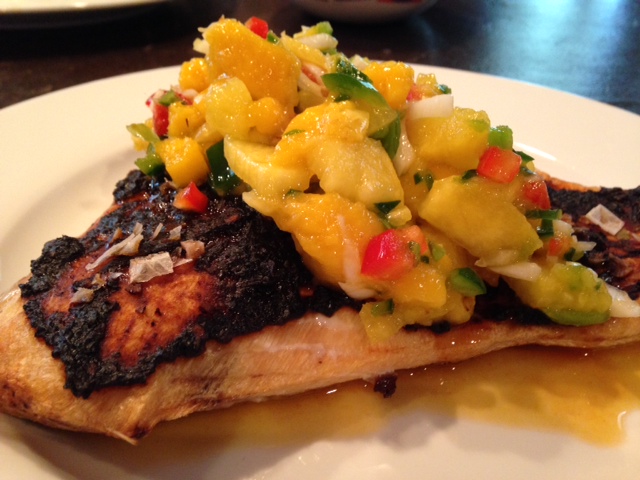
Mango Salsa:

1 ripe mango, peeled, diced

1 ripe avocado, diced

1/2 cup minced red onion

1 jalapeno, minced (more or less according to your heat preference)

1/3 red pepper diced fine

1/2 cup fresh tomato, diced

juice of 1 lime (or 2 if they are stingy with the juice)

1 pinch of good salt (Himalayan pink salt or Celtic salt)

2 TBSP chopped cilantro (optional – you know if you like cilantro or not!!)

Place all salsa ingredients into a bowl, stir gently to combine.  Taste for seasonings.  STOP!  I know how good it is!  Save it for the meal, snitchers!  😉


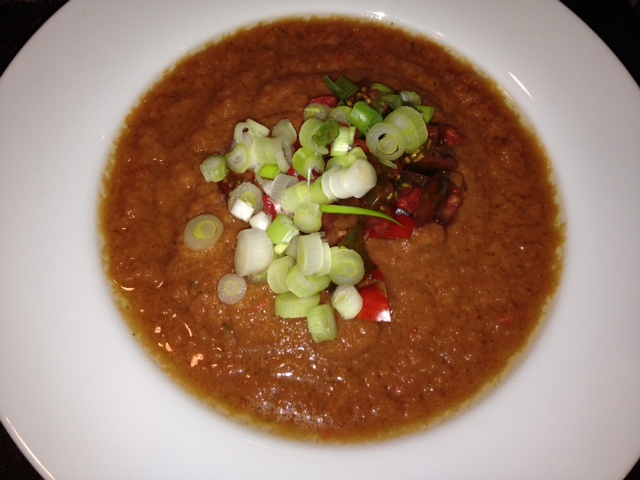
Now, for the chili sauce.  Don’t leave this out.  It brings this meal up several notches and you can use the chili sauce in a great number of other dishes for great umami.  (Umami is the 5th flavor center.  If you hit all the flavor notes of:  sweet, salty, bitter, sour and umami, you tend to be MORE satisfied with LESS!)

You will need a bag of dried Poblano peppers, called chile ancho.  They look like this: untitled

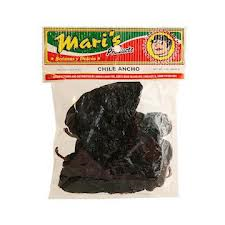
Place a large non-stick skillet on low-medium heat.  Place as many as you can easily fit onto a single layer on the pan’s surface.  You are only wanting them to soften slightly so they are workable.  (They are pretty stiff and unyielding right out of the bag!)  Let the peppers heat until you begin to smell the oils releasing their flavor.  Some slight blistering may occur.  Flip the peppers to get both sides.  When they are pliable, remove from the pan using tongs.  Allow to cool just enough to hold (or use a kitchen towel to hold) while you remove the stems.  They will just pull right out.  Now, place the de-stemmed peppers into a blender or food processor.  Add 1/2 cup of freshly-squeezed orange or mandarin juice to the blender.  Drizzle in 2-3 TBSPs of olive oil, 2-3 cloves of garlic and 1 tsp. of good salt.  You want to turn this into a paste so you will need more liquid.  I add hot water, 1/2 cup at a time, until it turns into a soft paste.  Now, pour and scoop the entire contents of the blender back into the skillet.  Cook over low-medium heat to dry and concentrate the flavors.  It won’t need long, maybe 5-7 minutes.  Remove from heat and store in a glass jar.  Excess will store in refrigerator for up to 2 weeks.  And a side note here, if you put this on a chip to try – it will be bitter.  It’s really not delicious by itself.  It’s ah-mazing in conjunction with a little sweetness or with a protein (like an omelet with chili sauce and cheddar cheese!)

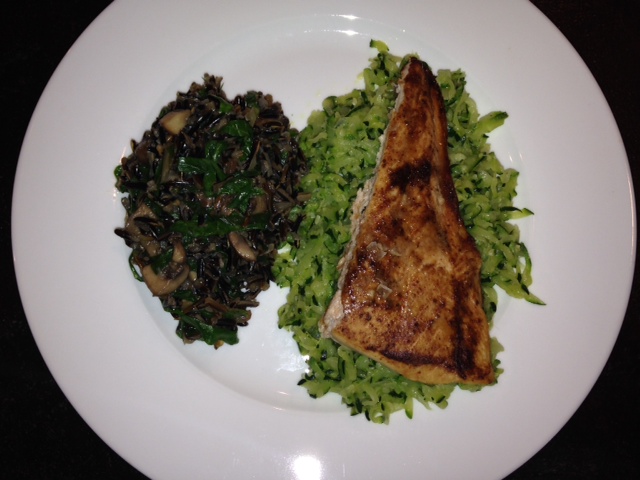
So, now you’ve got the go-alongs.  On to the chicken.  If you are lucky, you can have your friend/spouse/significant other grill boneless, skinless chicken breasts (or thighs) while you have been working on the salsa and chili sauce.  Or you can use a rotisserie chicken that has been de-skinned and deboned.  Either way, you need cooked chicken or shrimp or even white fish.  Whatever you choose, it’s going to be great!
And, you need wrappers!  Corn tortillas are traditional.  Flour are just fine.  Plan on 2 per person and run each tortilla through heated oil (I used coconut oil) to soften so the tortilla won’t tear on assembly.
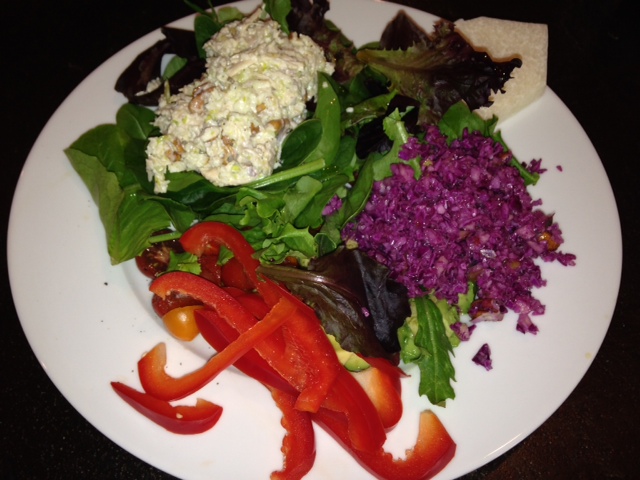
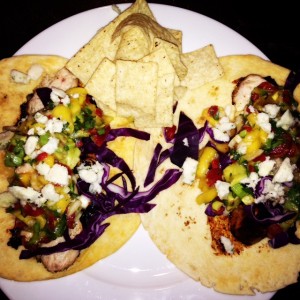
To assemble:
Place 2 tortillas on a plate and give each a schmear of chili sauce right down the middle.  Top this with 2 ounces of chicken and then the mango salsa.  We like to add a few strips of purple cabbage and top with feta crumbles or goat cheese.  Fold and enjoy!


Standard

Broiled Salmon on Zucchini Shreds with Wild Rice

photo (31)

This meal is simple but absolutely AH-mazing!  It’s 3 little processes put together to make for a lovely celebration or to make any day special.  The wild rice takes the longest to cook, almost an hour so let’s start with that.

1 cup wild rice

5-6 baby Bella mushrooms, chopped

2 shallots, minced

2 1/3 cup water or a combination of water and chicken stock

1 TBSP butter

Into a medium saucepan on medium-high heat, add butter to melt.  Add chopped mushrooms and shallots.  Cook and stir til tender, about 5 minutes.  Add rice, stirring to coat with fat and to get a little browning action (read FLAVOR).  Then, add your chosen liquid to the hot pan.  It’s going to steam up immediately so keep your hands and face back!  Bring it to a boil, reduce heat to simmer and place lid on pan.  Give it 55 minutes or until all liquid has been absorbed. Optional:  Stir in a few leaves of chard that have been sliced into thin confetti once the cooking is complete.  This makes it green and gorgeous and even more delish!

Now, the salmon!  Line a baking sheet with foil or parchment paper.  Preheat oven to 350 degrees.  Place the salmon filets, skin side down, on your lined pan.  Sprinkle a coating of Old Bay with Blackened Seasoning over the top.  (If you have regular Old Bay, just add a bit of brown sugar, honey or molasses.)  If you have balsamic vinegar, brush it on and smear the spices around to coat all the way to the edge.  I used Con Olio’s Espresso Bean balsamic vinegar and a swirl of their Blood Orange olive oil.  Yeah, baby!  For a final flourish, sprinkle with garlic salt flakes.  Now, into the pre-heated oven it goes!  Switch from conventional heating to broil (the pre-heating will begin to cook the fish through while the broiler browns the top.)  This should take 6-8 minutes, but watch closely so it doesn’t burn or over cook.  You can find specialty oil and vinegar shops in larger cities.  I found Con Olio on my last trip to Austin and went a little beserk (in a good way!).  Here’s a link if to their website for online shopping:   http://www.conolios.com/

For the zucchini shreds, you will need approximately 1 zuke per person.  Just wash and shred.  So easy!  You are going to love this!   Heat a large skillet to medium high heat and add 1 TBSP coconut oil.  When the oil is shimmering, add the shreds.  Salt with good salt (Himalayan or Celtic Sea Salt) to taste.  Stir and coat all shreds for 3-5 minutes, or until preferred doneness.

To plate:  Create a bed of the zucchini and top with the broiled-to-perfection salmon.  Spoon the wild rice next to this loveliness and get busy!

Standard

Father’s Day!

photo (30)

My Dad is absolutely the most optimistic person I have ever met.  It is an adventure to simply be in his presence.  I have been told I have his smile, and maybe I do.  But, more likely, I think I have his inherent enthusiasm for life.  I would normally say “joie de vivre”, but he’s not French (neither am I) and he doesn’t go much for fancy talking.  When I say he is optimistic and enthusiastic, I mean he absolutely expects the best possible outcome from any situation.  This is a wonderful gift.  With this knowing, the outcome may or may not be what you are hoping for, but there is a deep trust that the Universe is in control and things are as they should be.  He’s a terrible planner.  Wait, maybe he’s a fantastic planner.  He’s a “planner” – but, you have to know that “the plan” will be changed numerous times.  Details, phone calls, what if’s and everything affecting “the plan”.  Maybe that makes him a really great planner?  I don’t know.  I have very rarely heard him speak badly of anyone.  If he did, I can guarantee he or she really did do something to warrant his comment.  He loves a good joke and can call up a dozen that apply to any given situation.  He loves to laugh and he laughs with his whole face.  His eyes light up, his mouth opens and out comes a sound of pure joy.  I love to make my Dad laugh and he always laughs at my jokes, no matter how corny.  Just as I have at his over my entire life.  He has amazingly good luck.  I believe this comes from the previously described expectation of goodness.  When you are throwing around that much positive energy, a lot of it circles back to you.  He looks for the good in people and  when he witnesses otherwise, tends to forget.  Seriously!  He just doesn’t quite remember most “bad” things that happen, especially if some time has passed.  We can talk about old ski trips and any sort of fun we have had but, the negative stuff is mostly just filtered out along the way.  It’s really a great way to live your life.  He’s generous, caring and smart (although he might disagree).  If you have been a friend of my Dad’s for a while, he’s going to remember your birthday and call you on that day to wish you a Happy Birthday.  If he loves you, he will sing.  His life has not been without some pain.  He lost his own Dad when he was in his early 30’s and a daughter, my older sister, almost 5 years ago.  But, he’s one of those people that make you think “Nothing bad has ever happened to this person” because that’s exactly what he projects.  I love him and so do a whole lot of others.  I just got really lucky in the Dad Department.  xo

Standard

Coconut Oil for Stye

I am not posting a picture of my stye.  It wasn’t a bad one and if you want to see an image – get to Googling!  Suffice it to say, they are painful red swellings on the eyelid.  Traditional treatment includes hot compresses and avoidance of eye makeup.  Or a trip to the eye doctor in severe cases.  I have stopped my last 2 styes in their tracks by using organic coconut oil at first symptoms.  Coconut oil has a myriad of uses and this may be my favorite.  It’s antibacterial, antimicrobial and antibiotic.  Basically, it’s magic!

coconut oil

We have used lots of different brands and have been pleased with almost all.  Just be sure you are getting cold-pressed, extra virgin, ORGANIC versions.  So, for stye treatment, first wash your hands thoroughly and remove any eye makeup.  Take a small amount (pea-sized) and allow the heat from your hands to melt it. Using a very soft touch, pull the bottom eyelid away (kind of like you are inserting a contact lens) and use your other hand to apply the melted coconut oil to the bottom of the eye and tear duct.  This is easier if you turn your gaze away.  Using the same soft touch, spread the coconut oil up underneath the top eyelashes and around the eyelid.  You will probably experience a haziness from the oil coating.  That’s OK.  The coconut oil should not burn or cause any discomfort.  I do this just before bedtime and then it doesn’t matter if your vision is cloudy.  Apply 2-3 times per day.  Forgo makeup and keep your hands out of your eyes, otherwise!  Styes are contagious and can be spread to the other eye – so wash hands well before touching unaffected eye.  Hot compresses are also helpful.  My favorite way to do this is using a steeped tea bag – especially chamomile or green tea.  Just squeeze the tea bag to remove excess water and hold the hot tea bag on the affected eye.  Be patient.  It may take a couple of days before all the swelling abates but if it seems to be worsening or excessively painful, seek care from your provider.

Standard

Asparagus Frittata

photo 3 (26)

Oh Man!  I love a good frittata!  Some sweet friends showed up with a lovely batch of asparagus fresh from their family garden and I knew immediately what would be happening.  A frittata!  Thank you, Brian & Karen!

Although it sounds fancy, a frittata is just a baked omelet.  Your frittata will only be as good as your eggs, so choose wisely.  Connect with sources at your local farmers market or by asking around – you will be surprised how easy it is to find free pastured, local and sustainable eggs – and they have the most gorgeous orange yolks to boot!

To create:

1 medium onion, chopped

1 bunch asparagus (12-15 medium stalks or 20+ pencil stalks), chopped in 1 inch pieces

1 Tbsp bacon fat (or other natural fat like butter or coconut oil)

3-4 sliced bacon, crispy cooked, chopped fine

10-12 eggs, beaten

1/2 – 1 cup finely shredded Colby jack cheese

good salt and fresh ground black pepper

Place an ovenproof skillet on medium low heat and add 1 Tbsp. bacon fat.  When it’s loose enough to coat the pan, add chopped onion.  Cook until soft and translucent.  Add asparagus and enough salt and fresh ground black pepper for the veggies in the pan.   Cook and stir until the asparagus turns bright green.  Add the bacon pieces and reduce heat to low.  photo 1 (35)

Preheat oven to 350 degrees.  While veggies have been softening, crack eggs into mixing bowl.  Add 1 tsp. Himalayan or Celtic salt and 1/2 tsp. freshly ground black pepper and whisk into eggs.  Pour eggs into pan.  Gently cook eggs until about half-set.  Add desired amount of grated cheese and top with whole asparagus, if desired.  photo 2 (33)

Place pan into oven and watch closely.  Once the eggs are almost set (maybe 3-5 minutes) switch the broiler on.  Broil until lightly brown.  Remove immediately.  Allow to set for at least 5 minutes before slicing into pie shaped wedges.  Give Thanks for Good Friends who share and ENJOY!


Standard

Roast Beef and Provolone Hoagie

photo (15)

Yeah, I know.   I’ve been posting salads and lots of salmon recipes, but *sometimes*, you just need a hoagie.  This one is a doozy.  And, this one is NOT MINE.  It’s my honey’s ~ and, yes, it covers the entire plate.  I don’t recommend eating these every week… but, C’mon, it’s delicious.  Once in a while, it’s OK.  I won’t tell!

Your hoagie is only as good as the bread you put it on.  I used my homemade sourdough.  If you don’t bake, at least visit the bakery section of your grocery store and get a nice, artisan baguette.

You’ll need:

1 baguette

3/4 lb. thin sliced good roast beef (like Boar’s Head)

4 slices provolone cheese

extra thin sliced red onion

oregano

crushed red pepper

Slice the baguette in half, creating top and bottom crusts. photo 1 (34)

Slice again, from top to bottom in desired sizes for hoagies.  Open it up and place on a baking sheet.

photo 2 (32) Add thinly sliced onions to one half and roast beef to other half, proportionate to bread.

photo 4 (21) Top the onions with provolone and sprinkle on oregano and crushed red pepper, to taste.

Broil in oven til melty and slightly browned.  photo 5 (19)

You can thank me later!


Standard

Chicken Salad

I LOVE chicken salad.  We eat it regularly in warmer weather as part of a bigger salad like this:

photo (14)  In cooler months, I will split sourdough rolls and top the same recipe with avocado slices and cheese, melting it under the broiler for chicken salad melts.  However we eat it, we never tire of this.  And, it is SO EASY to make with staples we keep on hand.  Try it – and you will LOVE it, too!

For chicken salad, you obviously need chicken.  You can use a ready-made rotisserie chicken (skin and bones removed).  You can slow cook one that you then skin, bone and shred.  I like to do this for special guests – and that’s my husband’s favorite version.  For ease, purchase the large canned white meat chicken at your local grocer or big box store.

12.5 oz can chicken, drained

3-4 stalks of celery, diced fine

1/3 medium red onion, diced fine

1 apple (Granny Smith, Pink Lady, Honeycrisp or other firm, crisp variety), diced fine

1 Tbsp. real mayo

1 Tbsp. good olive oil

1 tsp. fresh ground black pepper

zest and juice of 1 small lemon (optional, but really freshens up the flavor)

1 cup chopped pecans (or other nuts, if preferred)

Into a medium mixing bowl, zest and juice lemon, add mayo, EVOO and black pepper.   Stir to combine.  photo 1 (33)

Add in finely chopped celery, onion and apple, (I chop mine in a salsa maker) mixing well.  photo 2 (31)

Flake in chicken and stir gently to combine.  Add pecans last, right before serving so they don’t lose their crunch.  photo 4 (20)

Crazy Good!


Standard

Apples and Walnuts

This could just as easily be Apples and Pecans or Apples and Almonds — it does not matter which nut you use.  It’s so good!  You’re gonna make this over and over!!

Tart Granny Smith apples are the way the to go in this recipe.  They are the perfect consistency, taking on a “bready” texture when fully softened.  This can be a most fabulous thing if you are avoiding carbs/gluten/and other questionable ingredients.

So simple!  So completely perfect!

3-5 Granny Smith apples, washed, cored and rough chopped (I leave the skin on – you can peel them, especially if using non-organic apples)

photo 1 (32)

2 Tbsp coconut oil or butter (or combination of the two)

pinch of salt

1 teaspoon cinnamon

1/2 teaspoon cardamom

Into a medium skillet on medium-low heat, melt fat and toss in the apples.  Add spices and stir gently. photo 2 (30)

Let this go for 15-30 minutes, stirring every 5 minutes or so, depending on your preference of doneness.  The apples will break down and add their own moisture and the spices will be well incorporated at the end.  We are not looking for browning – if you are getting browning – add a little water (not much) and reduce the heat.  I like mine soft around the edges and a little al dente in the middle.  When you have reached your desired tenderness, move the apples to one side of the pan and add another tablespoon of butter.  Turn the heat up enough to get a little sizzle and add in 1 cup of chopped walnuts (or pecans or almonds).

photo 3 (23)

Let the nuts cook (stirring to get all sides) for a couple of minutes until they release their oils and you are done!  Gently incorporate the apples and nuts and scoop into bowls.  Top with Greek yogurt, if desired. photo 4 (18)

Standard

Salmon Tostados

Sometimes you need a quick meal – and who’s to say it can’t be delicious, too?  This one fits the bill.  I can pull this off in about 10 minutes including cooking time.  It’s made from staples we keep on hand and we ♥♥♥ it.  Enough of the buildup – let’s see it!

photo (13)

This recipe makes 2 tostados.

1 6oz can boneless, skinless canned salmon (wild caught), drained

(I get mine from Sam’s Club – it’s pictured here)  Member's Mark® Wild Caught Alaskan Pink Salmon- 6/6 oz. cans

If your protein needs are high, it’s ok to add another can – they are tiny, after all.

8-10 kalamata olives

5-6 sun-dried tomatoes in olive oil – you don’t need the liquid – just the tomatoes

1 Tbps. real mayo

1/4 tsp. fresh-ground black pepper

2 flour tortillas

1/2 cup grated cheddar cheese

1 ripe avocado

Place the olives and sun-dried tomatoes into a small food processor (I use a Bullet with the small jar attachment) and grind this into a spreadable, paste-like consistency. photo 5 (18)

If you don’t have this kitchen appliance, just chop it up as small as you can using a knife, the flavor will be the same, just not the consistency.  Take the tomato/olive mixture and place it into a mixing bowl.  Add the mayo and freshly ground pepper.  photo 1 (30)

Mix and stir until combined.  Flake in the drained salmon.  Stir gently to just incorporate the salmon (but don’t KILL it here).

photo 3 (21)

Now we are ready to assemble the tostados.  Onto a baking sheet, place 2 tortillas side-by-side and not overlapping.  Top each with half the salmon mixture, spreading to an even layer leaving about 1/2 inch of tortilla edge.  Now add 1/4 cup cheese to each. photo 4 (17)

Slide this into an oven and turn the broiler on.  Broil for 3-5 minutes or until hot and bubbly, with some browning of the cheese and exposed tortilla.  Watch closely – it can go from “almost done” to “too done” in a hurry.photo 2 (29)

Slide each tostado onto a plate and top with 1/2 avocado.   ENJOY!  photo 3 (22)

Standard